Reversed videos are used to create interesting visual effects making them unique & intriguing to the viewers. Many people nowadays prefer to watch videos backward, be they short videos or longer ones.
And that leads us to one of the most frequently asked questions- Can you watch YouTube videos in reverse?
Yes, you can watch YouTube videos in reverse. But to do that, you have to download the YouTube video first and then use video editing tools to reverse the video. It’s because YouTube itself doesn’t have any inbuilt feature to reverse video.
Let’s take a quick look at the steps to reverse YouTube videos. These steps may vary slightly depending on the site/ application you are using.
- Download the YouTube video using YouTube Downloader Apps/ Sites.
- Install any Video editor app compatible with your device. Or, visit any of the online video editor sites (EZGIF, Clideo, etc.)
- Upload/Import the video file.
- Click on the Reverse option.
- Once the video is processed completely, download/export it. Now you can watch the reversed video.
We have listed the best apps/sites for reversing video below. The apps/sites mentioned in this article can be used to reverse any video—not just YouTube videos.
We have also provided the steps to use each app/site to reverse video. Continue reading for detailed steps.
Prerequisite:
Before we proceed to the apps and sites to reverse videos, you need to download the YouTube video(s) that you wish to watch backwards.
To download, you will need to use a YouTube Video Downloader App or visit a YouTube Video Downloader site. Check out our guides: Best YouTube Video Downloader Sites & Best YouTube Video Downloader Apps for our top picks. You can pick any that you like.
How to Reverse a YouTube Video with Video Editor Apps [Works on All Devices]
There are many video editor applications that are capable of reversing video. Let’s discuss some of the best apps that you can use to reverse YouTube videos.
Beecut
BeeCut is an exceptional video editor that supports multiple operating systems. Reversing video is one of the many editing features it offers.
| Supported Platforms | Pros | Cons |
| Windows, Mac, Android, iOS | 👍 Easy to use 👍 Lots of features and editor tools. 👍Supports multiple formats and resolutions 👍 Supports multiple platforms | 👎 Limited features in trial version |
Steps to reverse video with BeeCut (free trial version):
1. Visit BeeCut official site. Click Free Download option to download the app.
2. Install the BeeCut app & launch it.
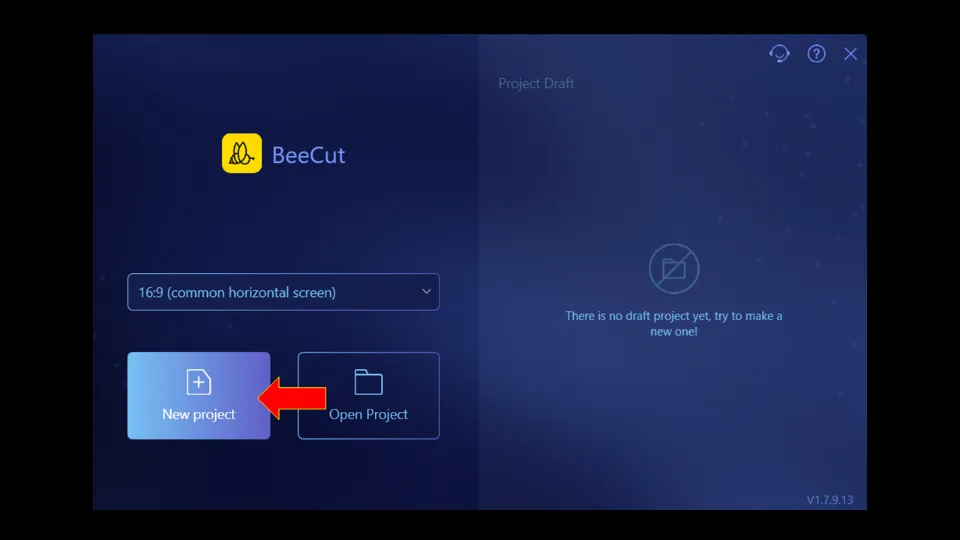
3. Hit + New Project.
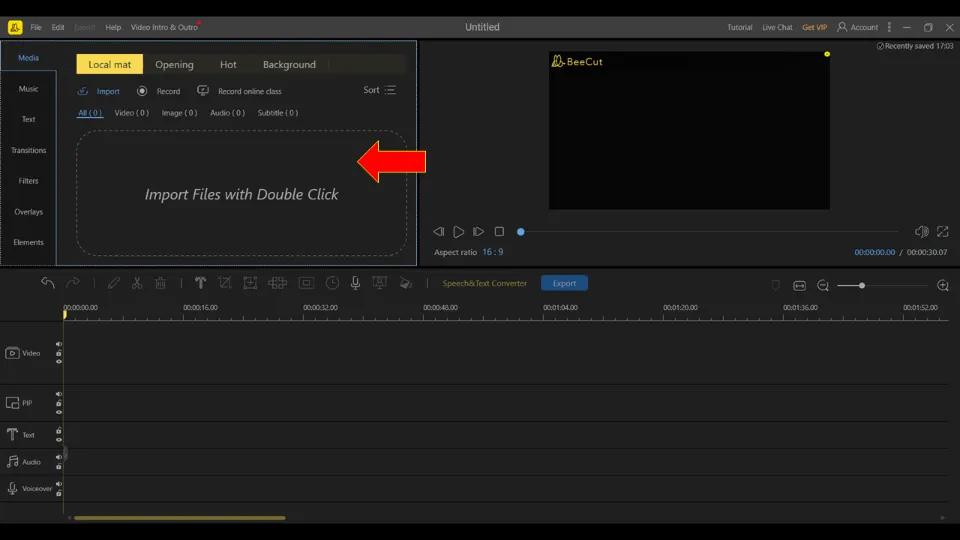
4. Double-click on the Import Video section & upload video. You can also import the video file by dragging & dropping it in the Import section.
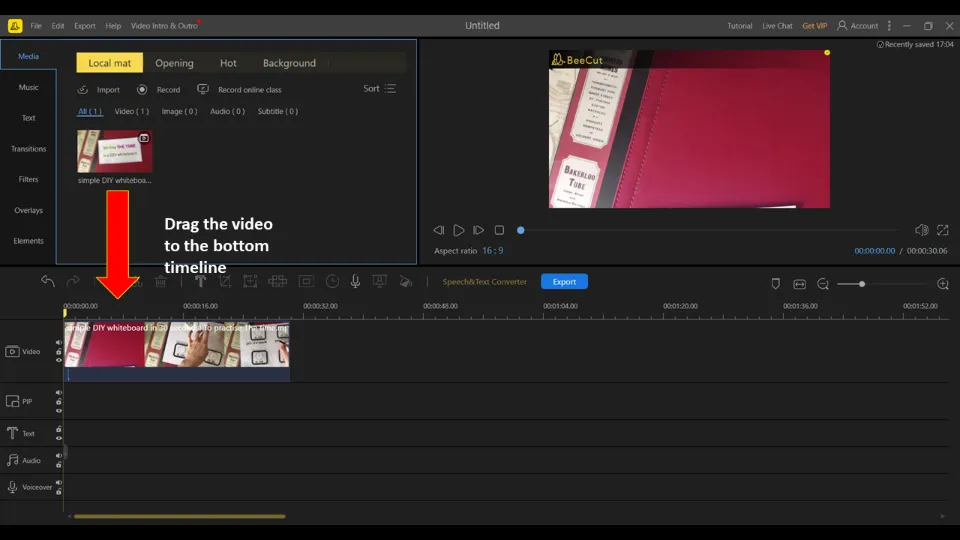
5. Drag the video to the bottom timeline. Then, click on the video file.
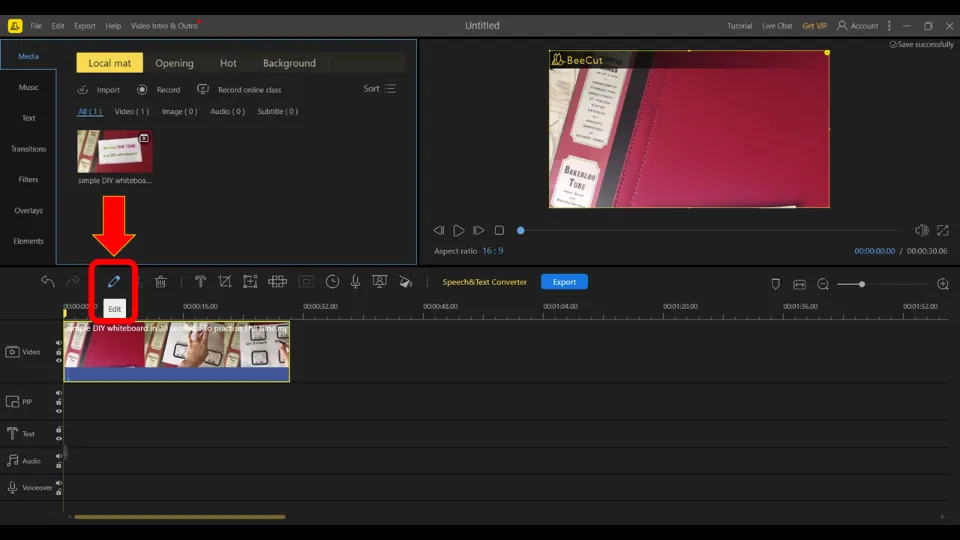
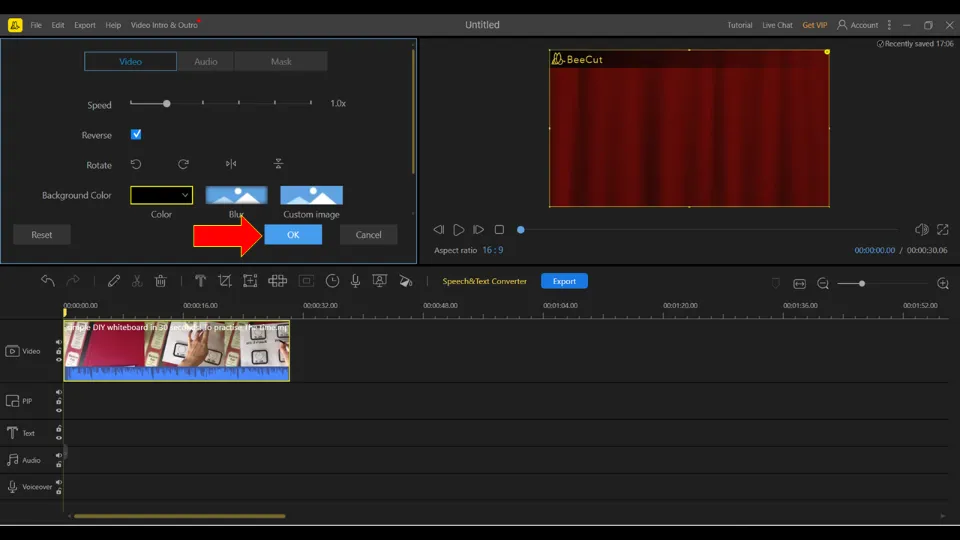
6. Hit the Edit icon.
7. Click on the box next to Reverse.
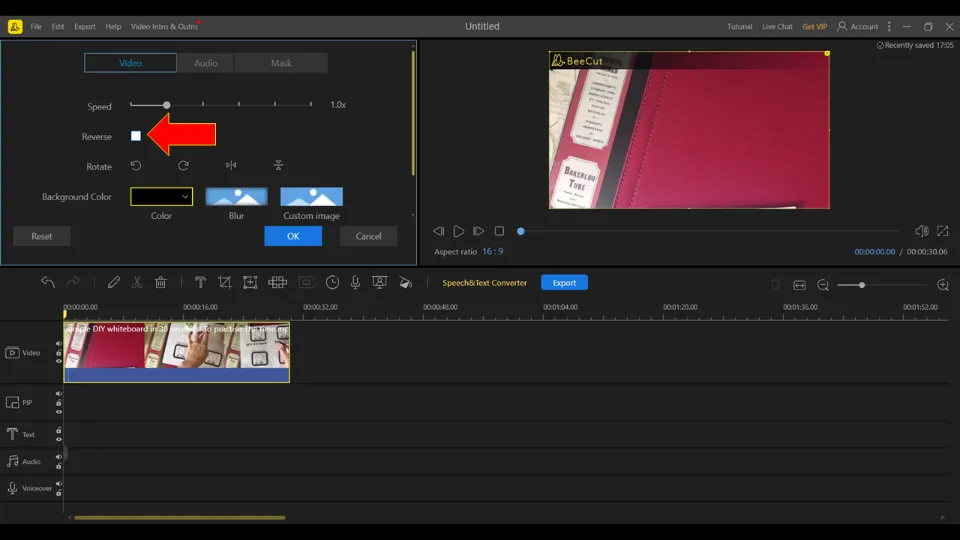
8. When the video reversal is processed completely, select OK.
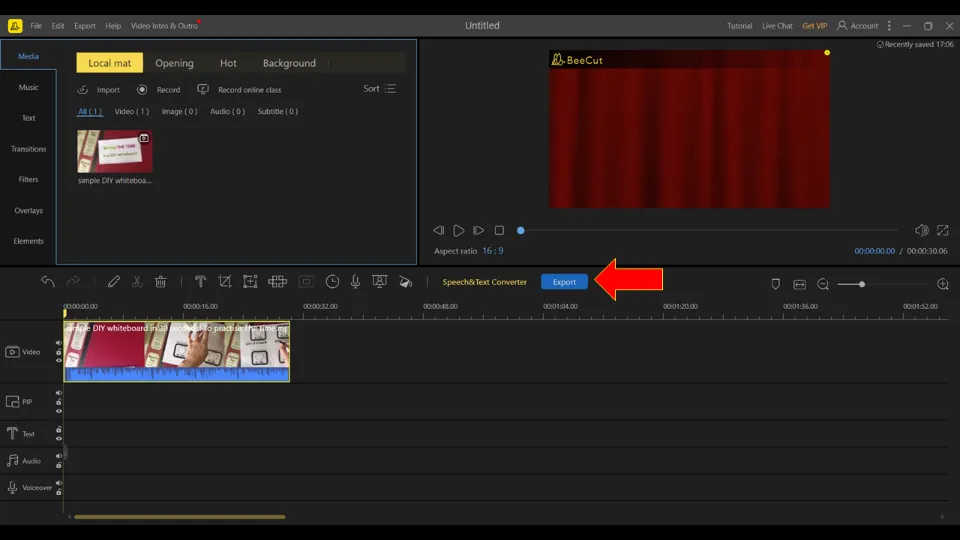
9. Click Export.
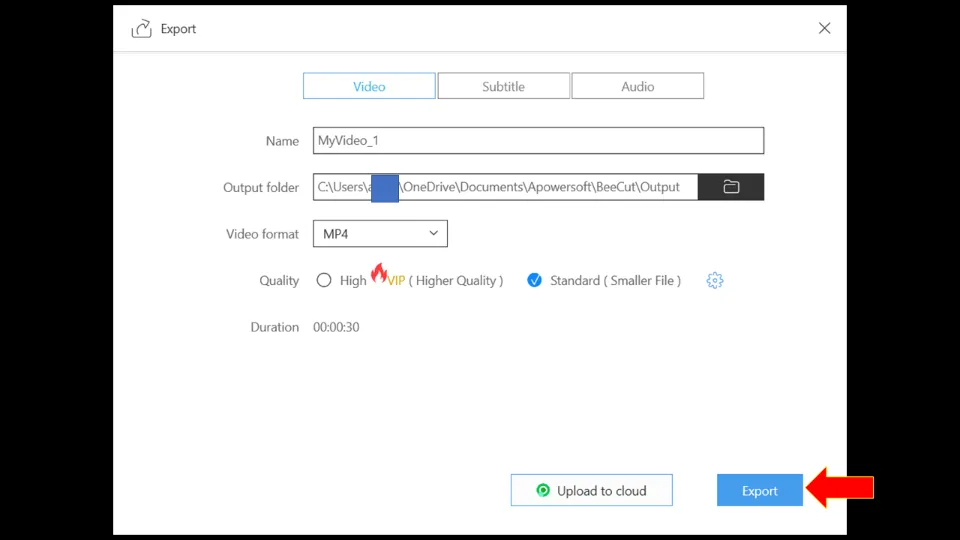
10. Choose video resolution & format. And, again select Export.
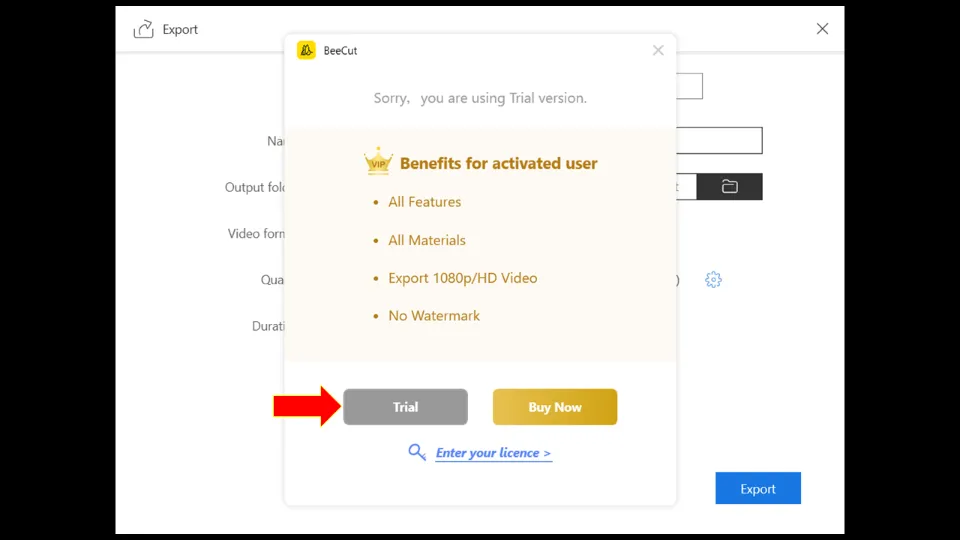
11. I am selecting the Trial option as I intend to use the free version.
12. Wait till the Export process is finished.
You can now play the video here or you can open the file location.
Subscription Model:
Beecut has two subscription models- Personal & Business. It offers lifetime, annual, and monthly subscription options.
The Personal mode subscription price ranges from $29.95 to $99.9
The Business mode subscription price ranges from $79.95 to $259.9

Premium Version Benefits:
✅No Watermark
✅Export HD video/ 1080p video
✅Use all features without restriction.
How to Play YouTube Videos Backward on Windows
These are the two best Windows apps for reversing video.
For the full list, read our guide on How to reverse videos on Windows.
1. EaseUS Video Editor
EaseUS Video Editor is a brilliant video editor application for Windows devices. You can easily reverse videos using it.
| Supported Platforms | Pros | Cons |
| Windows | 👍Supports multiple formats and resolutions 👍Easy-to-use | 👎 Limited features in trial version |
Steps to reverse video with EaseUS Video Editor ( free trial version):
1. Visit EaseUS Video Editor official site. Click Free Download option to download the app.
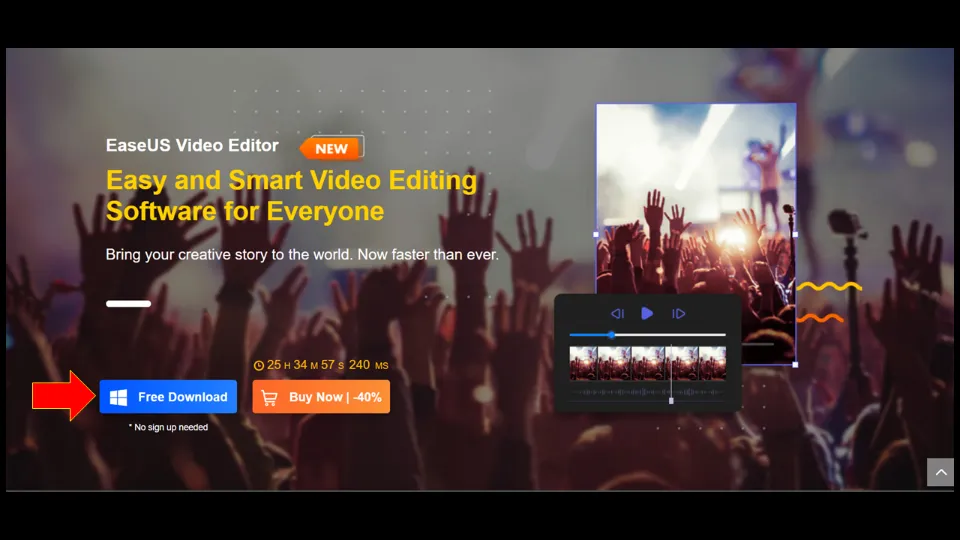
2. Install the app & open it.
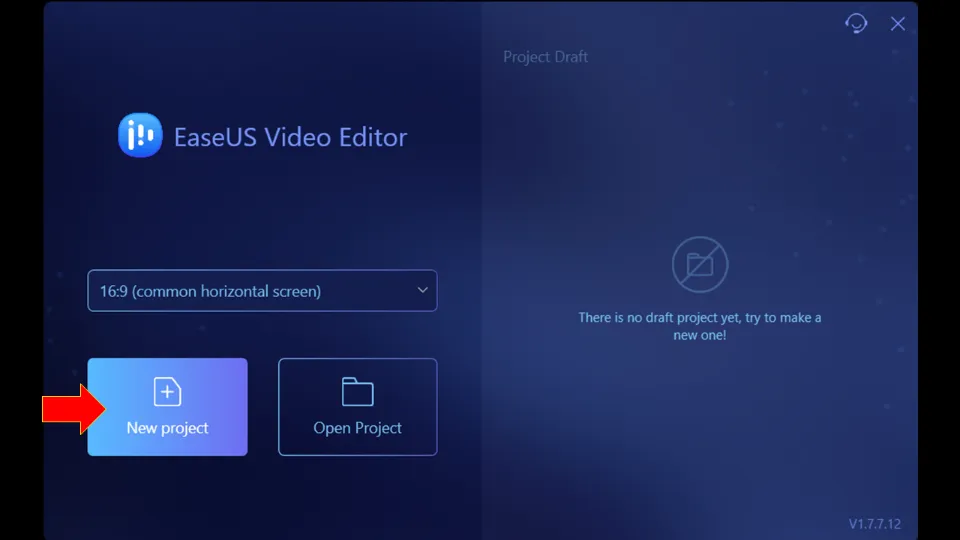
3. Choose + New Project.
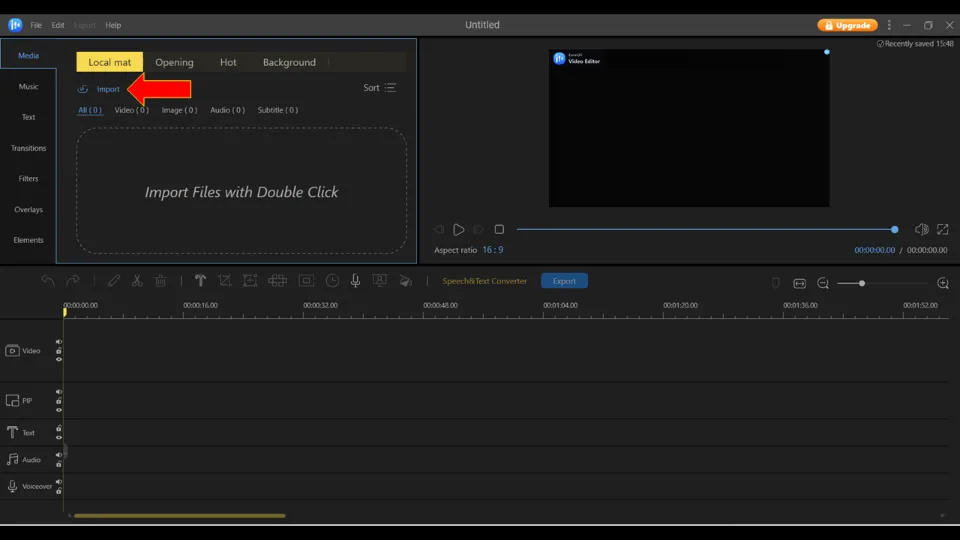
4. Double-click on the Import Video section & upload the video you want to edit. You can also import the video file by dragging & dropping it in the aforementioned section or by clicking Import option.
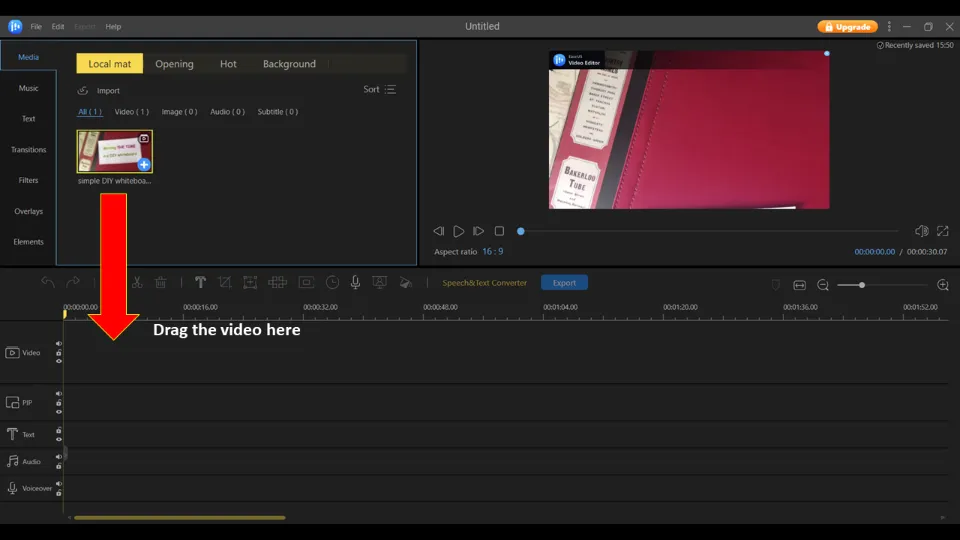
5. Drag the file to the bottom timeline & then, click on the file.
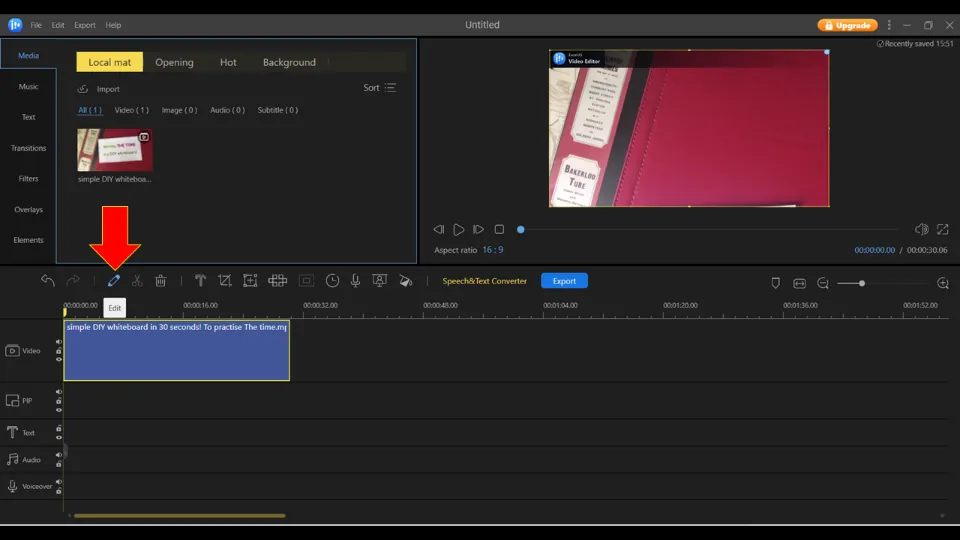
6. Click Edit icon.
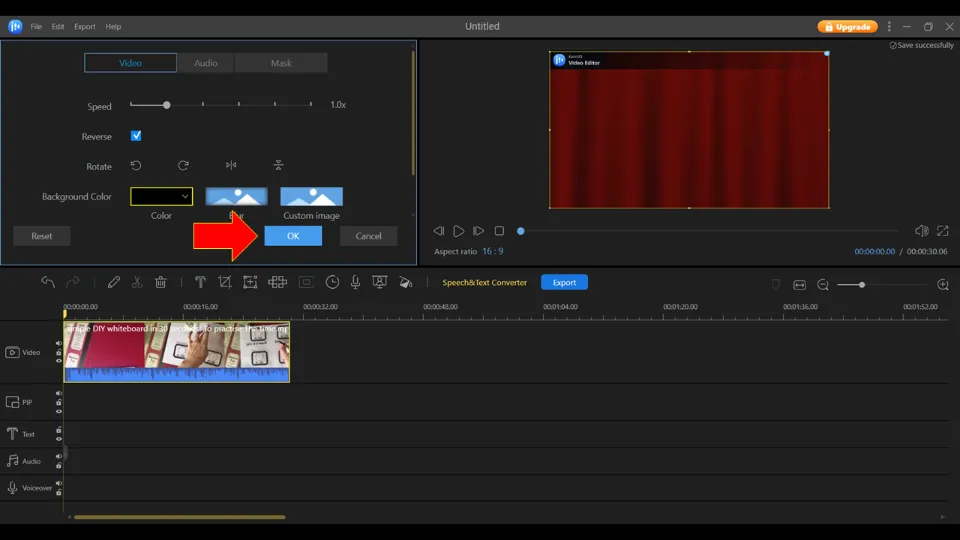
7. Choose Reverse option by ticking the box next to it.
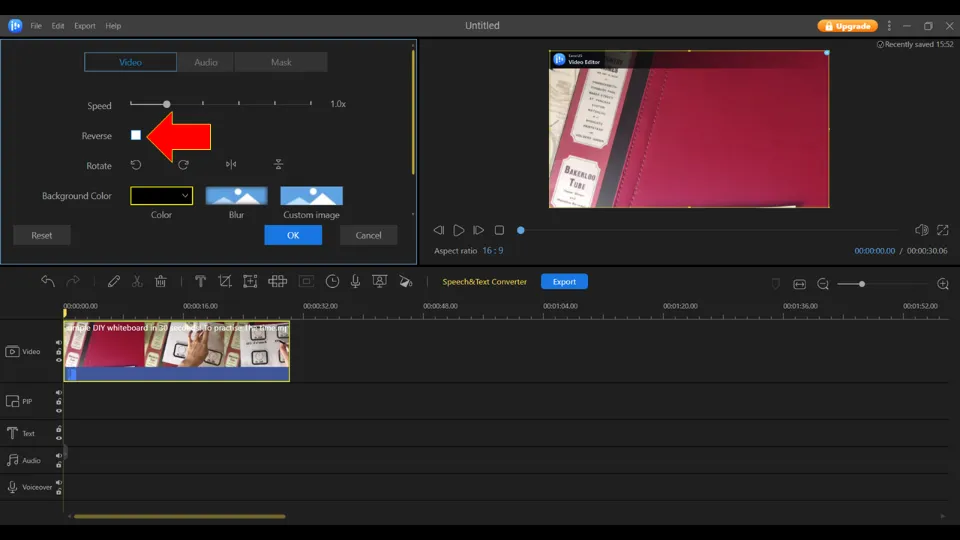
8. After the video is reversed, hit OK.
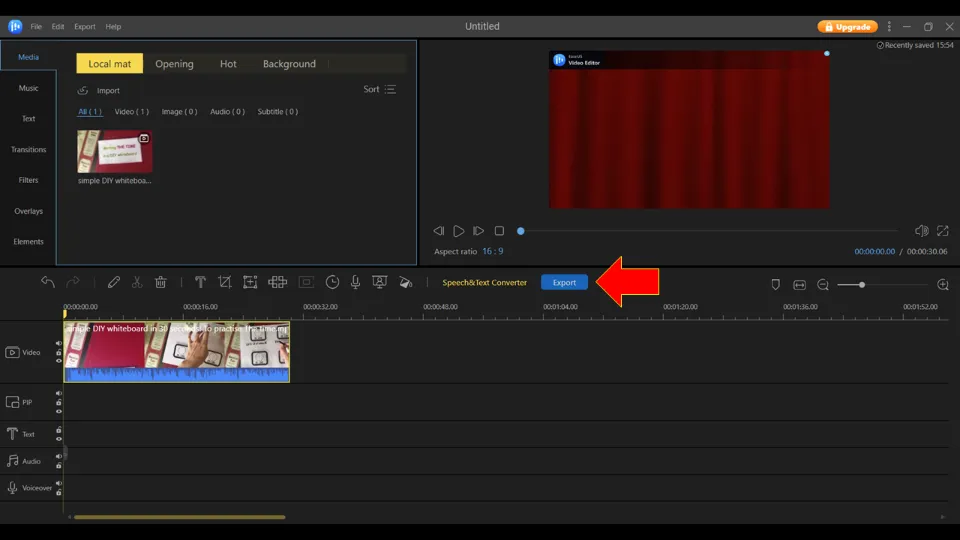
9. Then, hit Export.
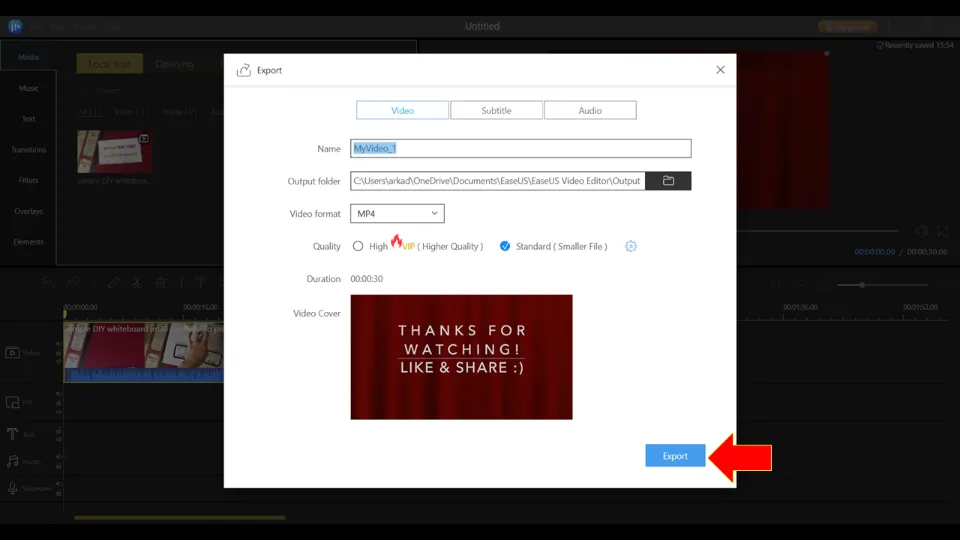
10. Choose video resolution & format. Next, click Export again.
11. I am selecting the Trial option here as I will use the free version.
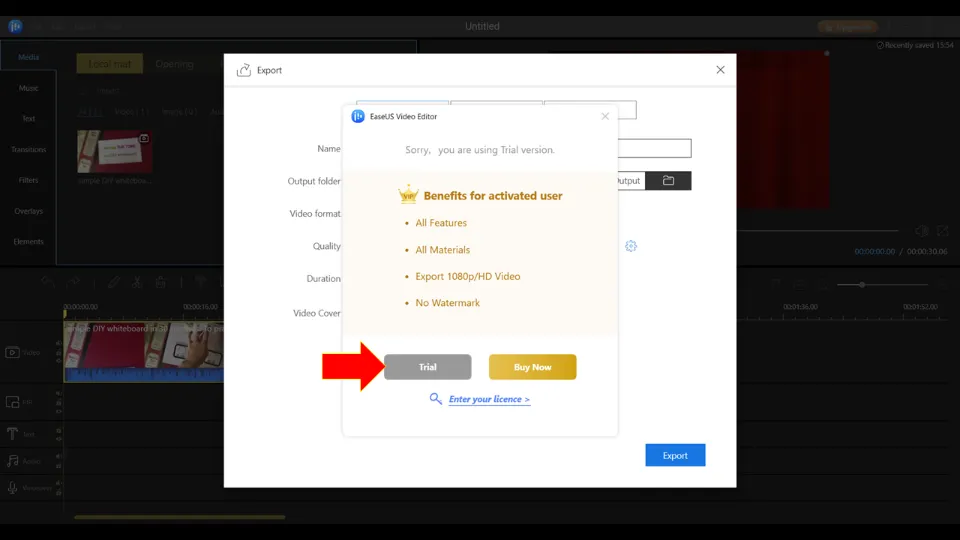
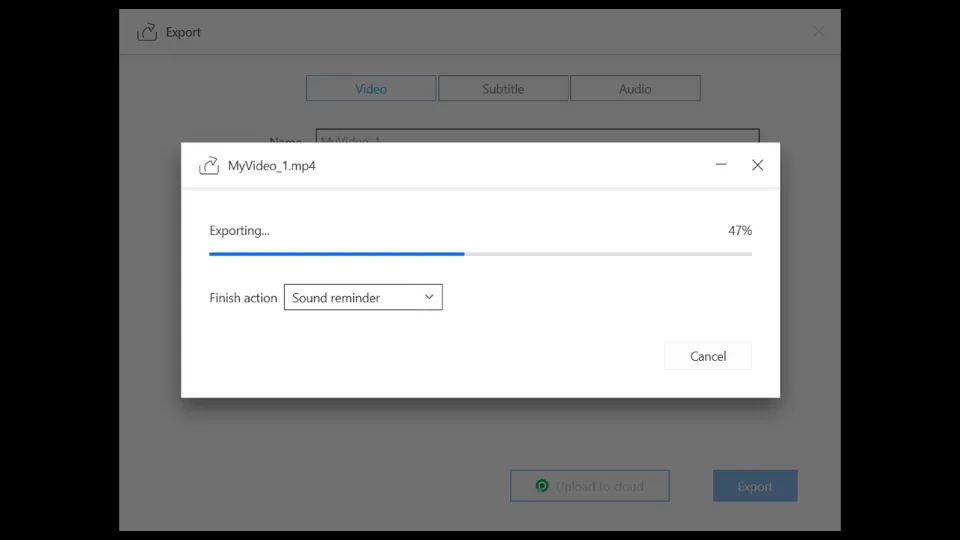
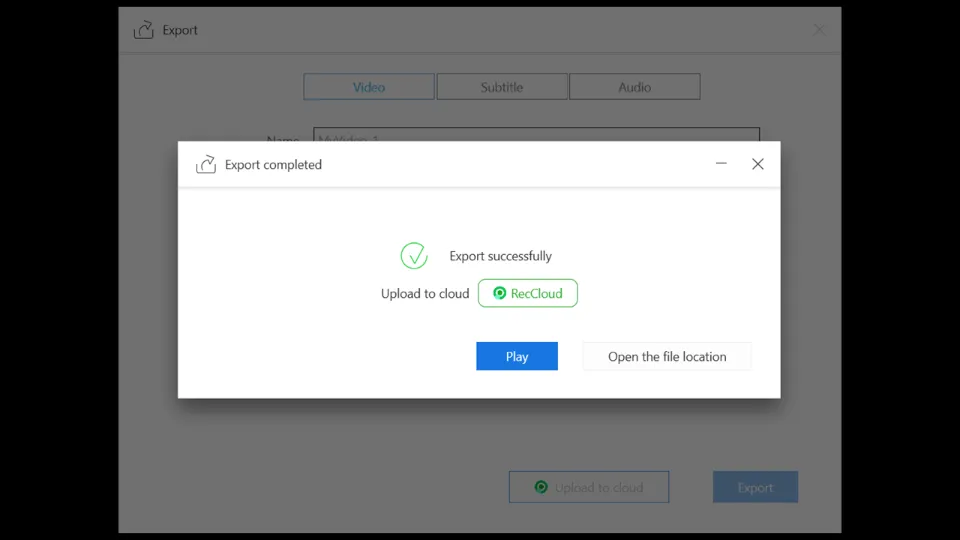
12. Finally, wait for the video to be exported successfully.

Subscription Model:
You can subscribe to the premium version of EaseUS Video Editor in three ways: monthly, yearly, or lifetime subscriptions.
The subscription cost ranges from $17.97 to $79.95
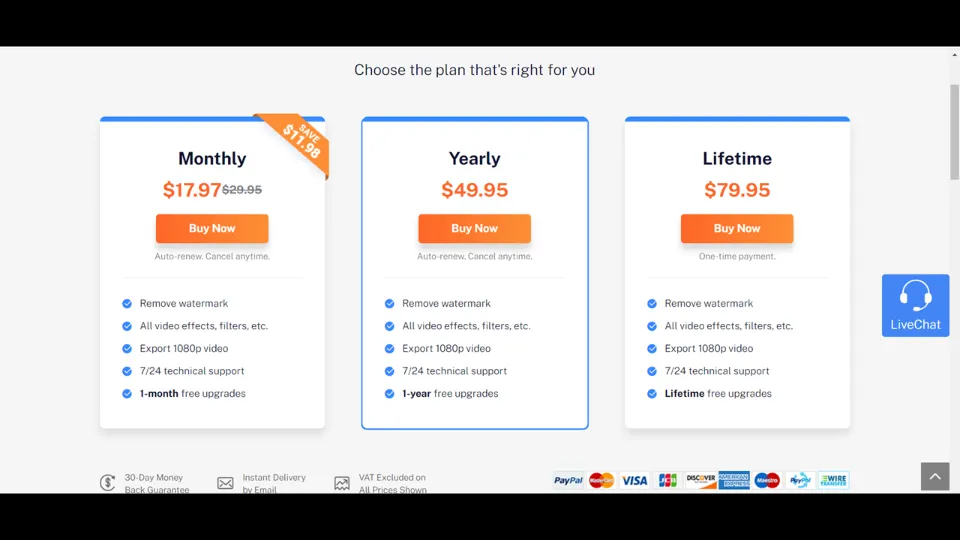
Premium Version Benefits:
✅Export videos without Watermarks
✅Use all features without restriction.
✅Export 1080p video
2. Reverse Video
Reverse Video is a nice Windows application specializing in reversing videos.
| Supported Platforms | Pros | Cons |
| Windows | 👍Nice and easy-to-use | 👎 The free version only allows reversing of videos of shorter duration |
Steps to reverse video with Reverse Video using the free version:
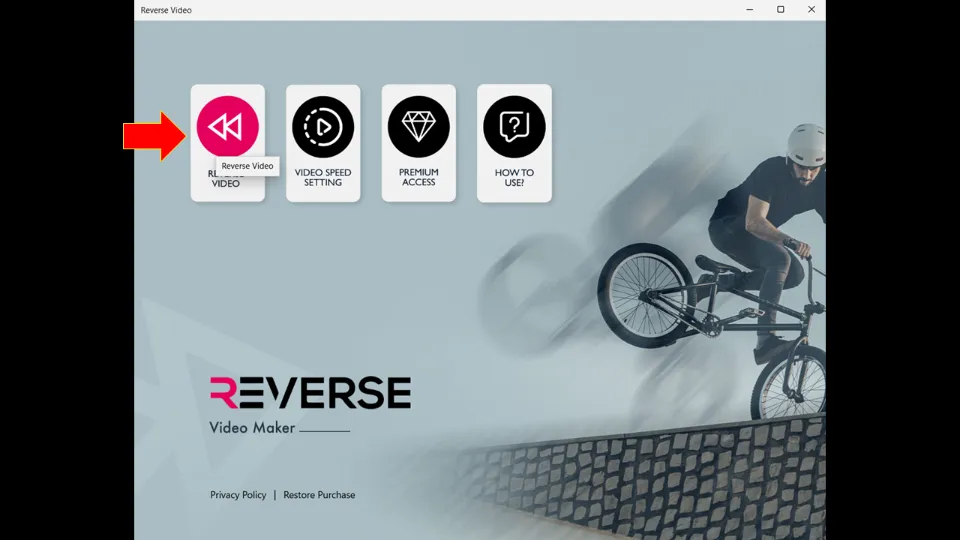
1. Install Reverse Video from Microsoft Store & open it.
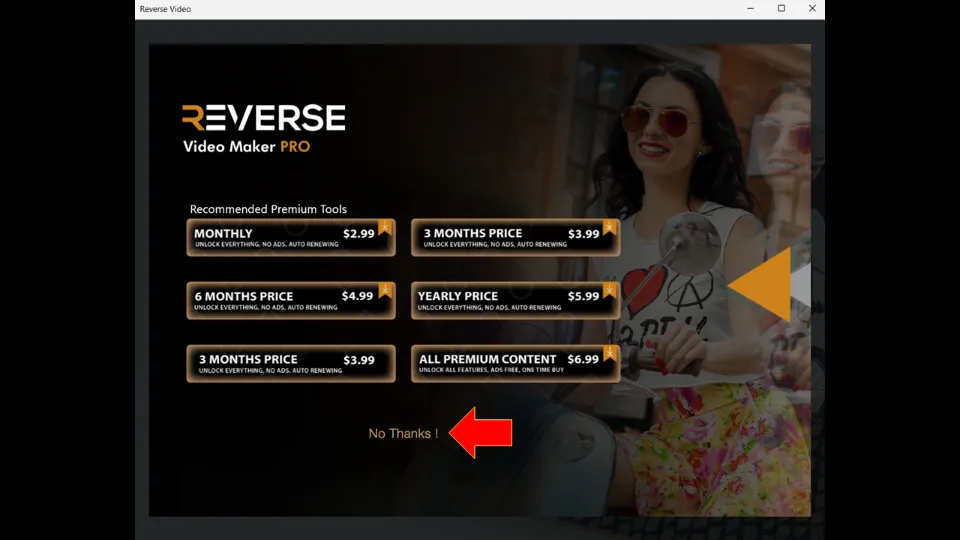
2. Next, I am choosing the No Thanks option as I will use the free version of the app.
3. Select Reverse Video. And then, upload the video you want to reverse.
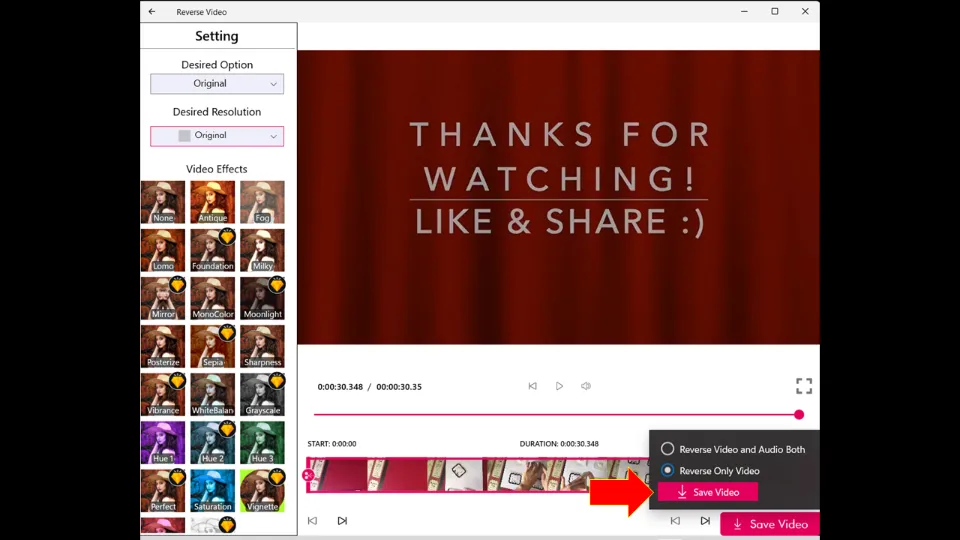
4. Choose the video starting time & ending time.
5. Then, select Save Video.
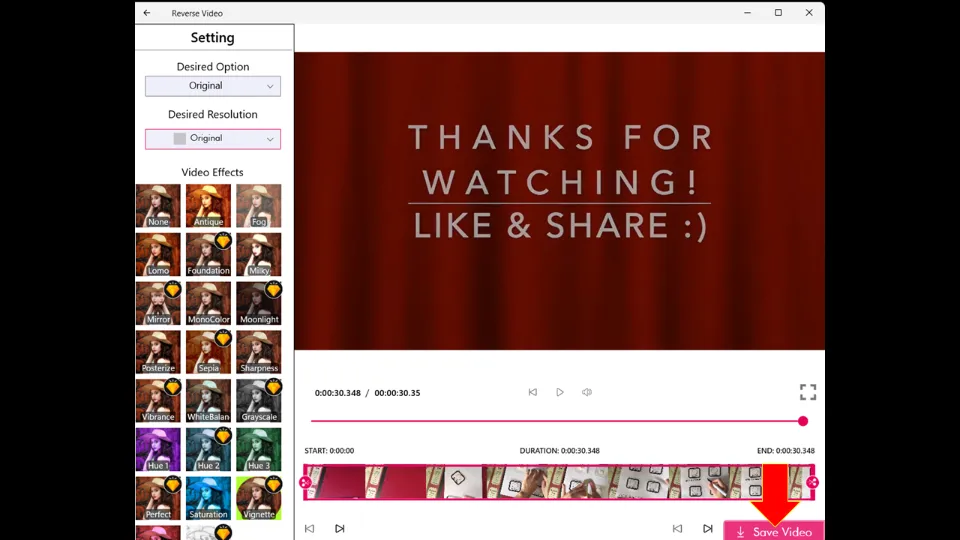
6. Select whether you want to reverse both audio & video or just the video. Click Reverse Only Video option if you just want to reverse the video and hit Save Video.
7. Wait till the video is reversed.
Subscription Model:
The subscription cost of the premium version ranges from $2.99 to $6.99.
Premium Benefits:
✅No advertisements
✅Increase speed of video up to 2.5x & 3x
✅Edit videos of any length/ duration
How do I play a YouTube Video Backward on Android
These are the two best Android apps for reversing video.
For the full list, read our guide on How to reverse videos on Android.
1. FilmoraGo Video Editor & Maker
FilmoraGo Video Editor & Maker is an awesome Android application that you can use for video editing including video reversing.
| Supported Platforms | Pros | Cons |
| Android | 👍Powerful video editor 👍Easy-to-use | 👎HD video support not available in free version |
Steps to reverse video with FilmoraGo Video Editor & Maker:
1. Install FilmoraGo Video Editor & Maker app from Google Play store & launch it.
2. Tap + NEW PROJECT.

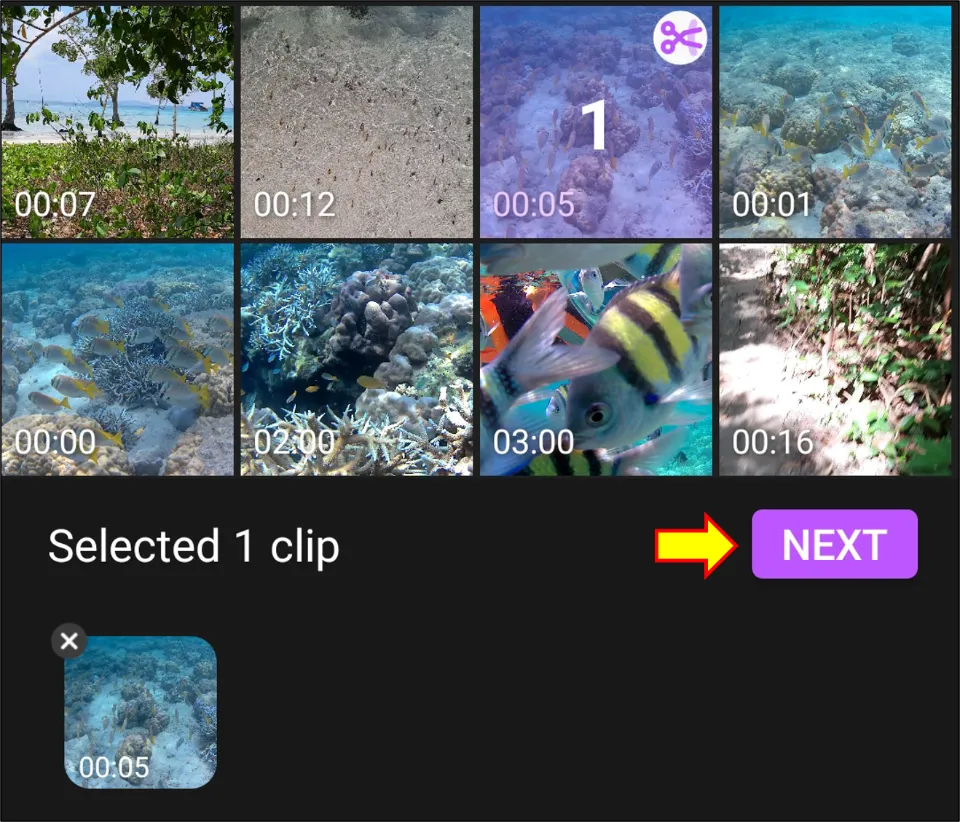
3. Choose the video you want to reverse & tap Next.
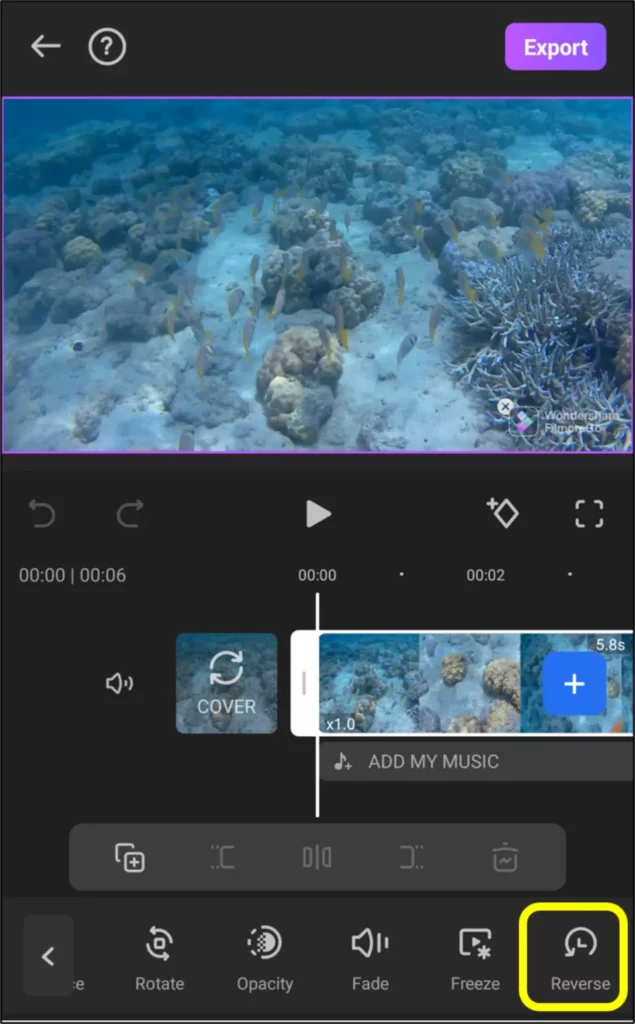
4. Click the video from the timeline & click Reverse icon.
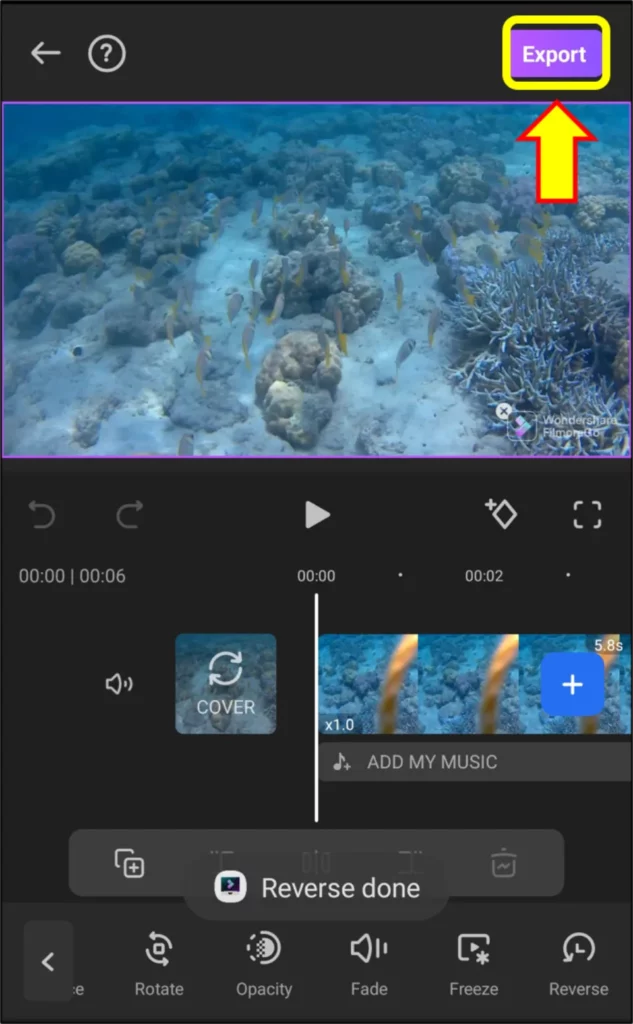
5. Choose the desired resolution. Decide whether to keep watermark or not. And lastly, tap Export option.
Subscription Model:
The premium version costs around $32 for lifetime memberships & $18.2 for annual memberships
Premium Benefits:
✅Remove Watermarks
✅1080p HD video support
✅Use 5000+ premium Templates and stickers
2. Reverse Movie FX
Reverse Movie FX is a superb easy-to-use application that specializes in reversing videos.
| Supported Platforms | Pros | Cons |
| Android, iOS | 👍 Reverse video easily | 👎 Video processing speed is sometimes slow |
Steps to reverse video with Reverse Movie FX:
1. Install Reverse Movie FX from Google Play Store/ iOS Store and launch it.
2. Tap on START REVERSE option.

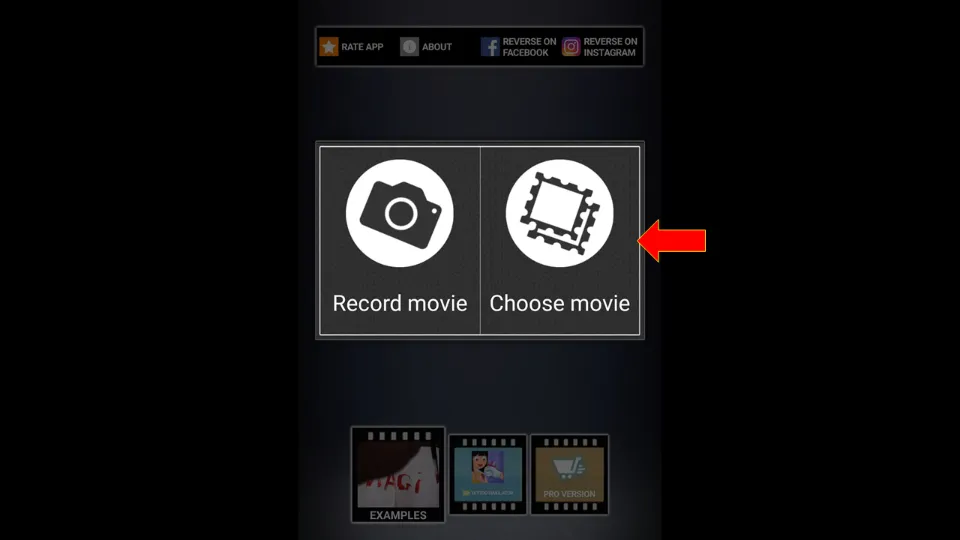
3. Then, click either Choose Movie option or Record movie option and upload video.
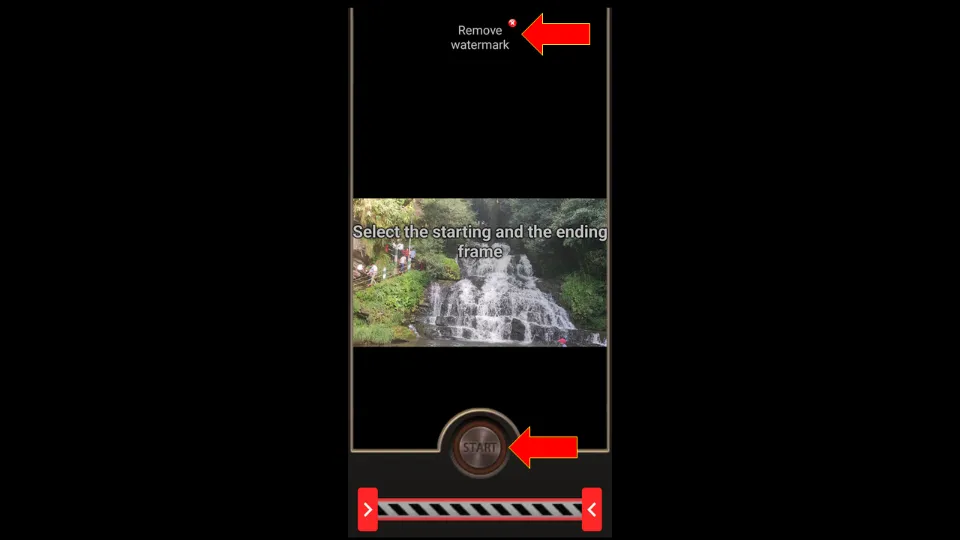
4. Next, select the start and end time of the video. Click on the Remove Watermark option to remove watermark. Then, click START.
Note: You need to buy the premium version of Reverse Movie FX to remove watermark. This app sometimes even offers to remove watermarks from videos if you agree to watch a few ads.
5. Select reversed option. And then, choose whether you want to mute the audio or not. You can also add filters and music to the output video. Then, tap Start Reversing.
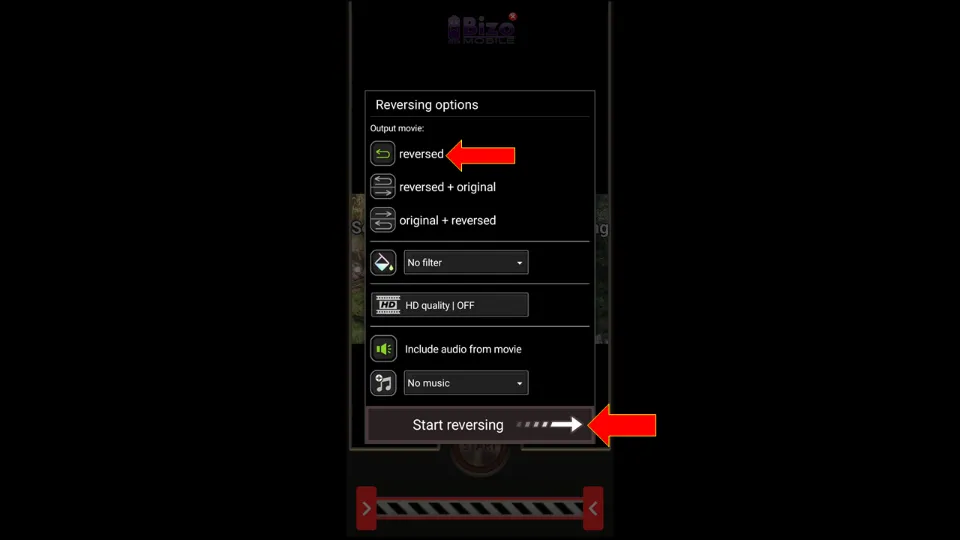
6. Once the output video is ready, you can directly share it with different social media platforms.
Subscription Model:
The premium version costs around $2.5 annually
Premium Benefits:
✅Remove Watermarks
✅No Advertisements
✅HD video support
✅Use all features without restriction
How Do I Get a YouTube Video to Play Backward on iOS
Reverse Vid & Reverse Movie FX are by far the best apps to reverse video on iOS devices. We have already discussed Reverse Movie FX in the previous section.
1. Reverse Vid
Reverse Vid is an amazing iOS application for reversing videos & adjusting their speed.
| Supported Platforms | Pros | Cons |
| iOS | 👍 Easy to use | 👎 Fails to recognize certain video formats sometimes |
Steps to reverse video with Reverse Vid:
1. Install Reverse Vid from iOS store and launch it.
2. Select Gallery icon & then select the video you want to upload. Then, tap Choose.
3. Finally, choose the preferred reverse video speed & click on Check mark icon. Wait for a couple of minutes till the video is reversed completely.
How to Watch a YouTube Video Backward with Online Video Editors
These are the top two online editor tools for reversing video.
1. EZGIF
EZGIF is a brilliant tool that lets you edit videos online without the need for any additional app installation.
| Supported Platforms | Pros | Cons |
| Any Browser | 👍 Free and simple to use 👍Edit videos without installing any apps 👍Superb editor tools and features | 👎Processing time slow compared to offline video editor tools 👎Not suitable for lengthy videos 👎 HD Video quality not available |
Steps to reverse video with EZGIF:
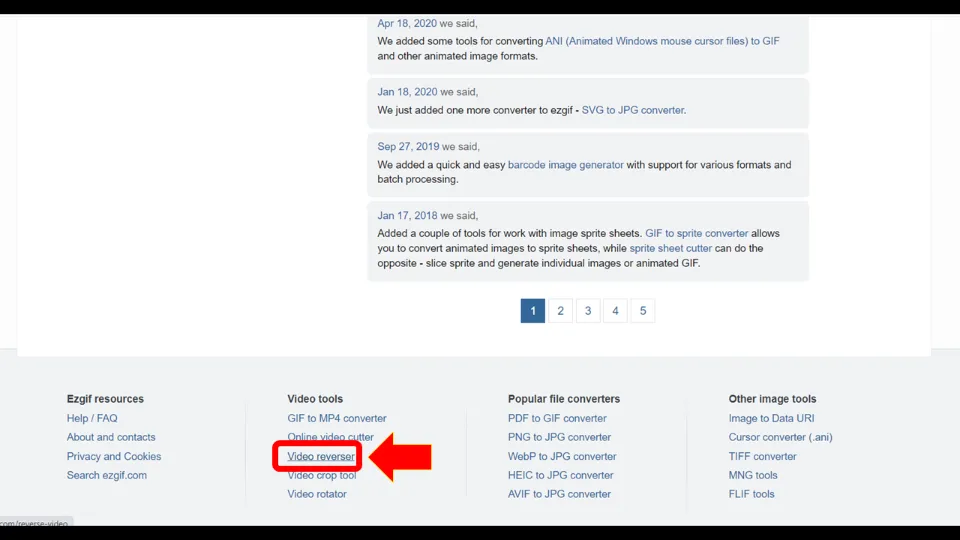
1. Visit EZGIF official site.
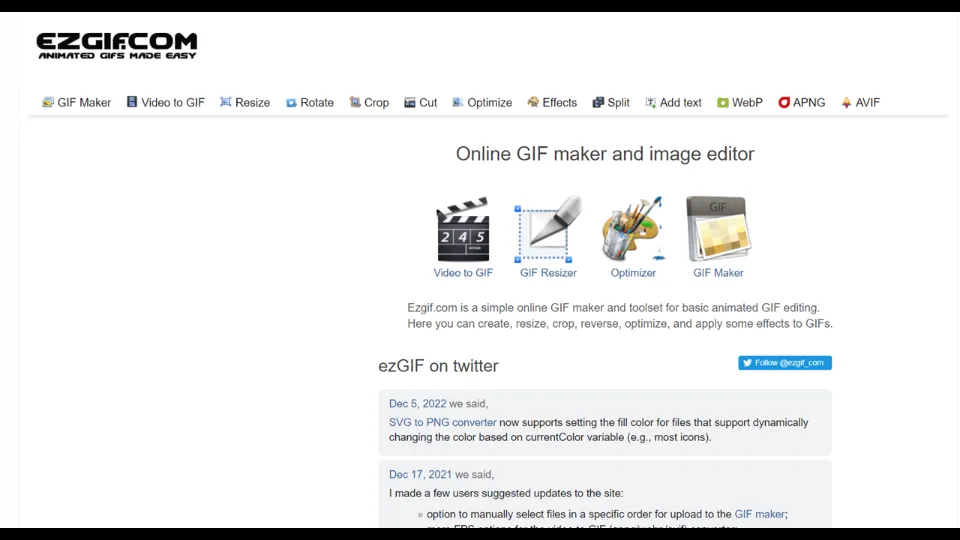
2. Scroll down & click Video Reverser.
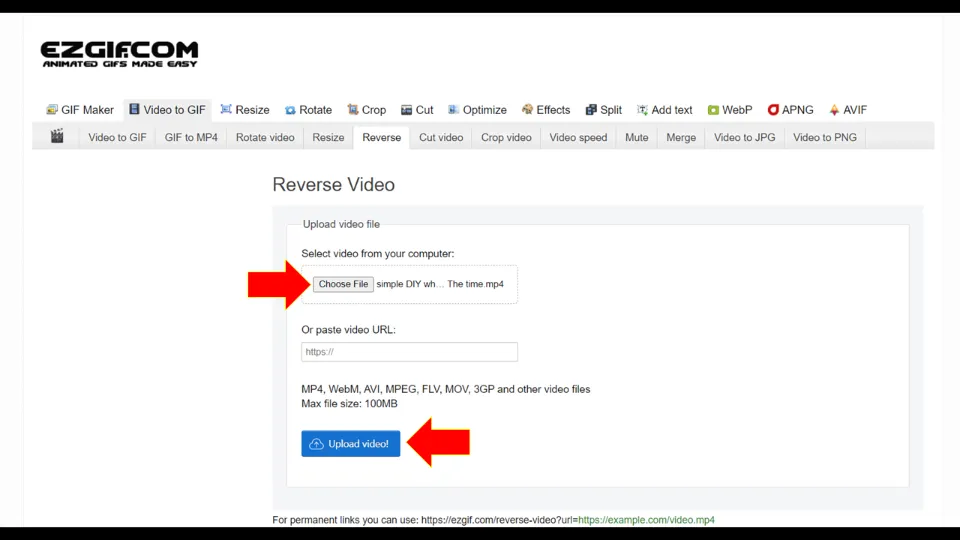
3. Select the video file you want to reverse. You can also paste video URL if you want. Then, hit Upload video!
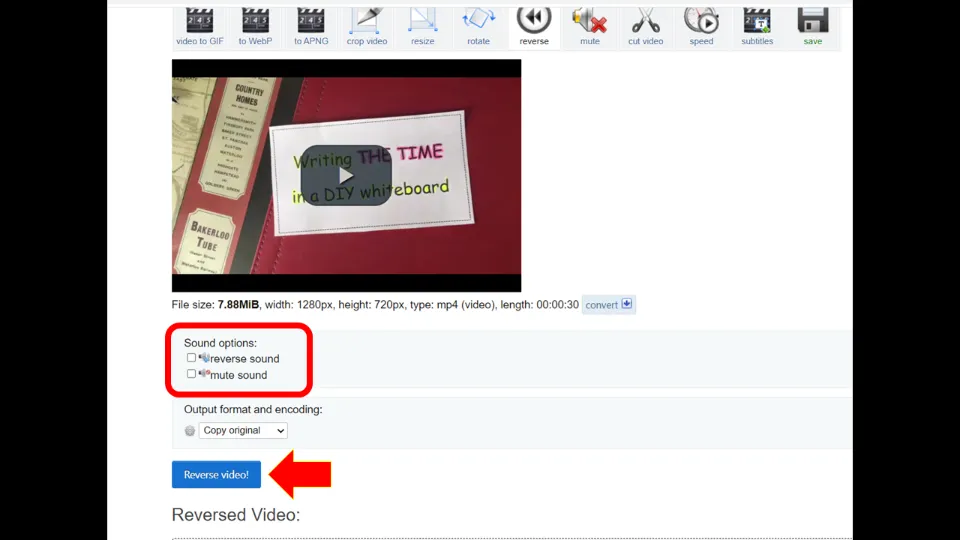
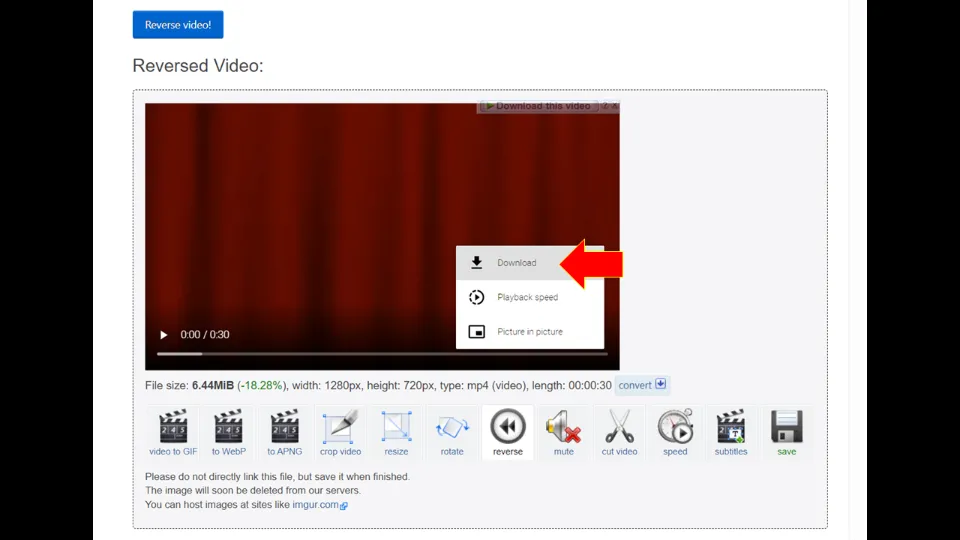
4. Mute or reverse the audio according to your requirement. Then, hit Reverse video!
5. After the video is reversed, click on the 3 dots icon next to it.
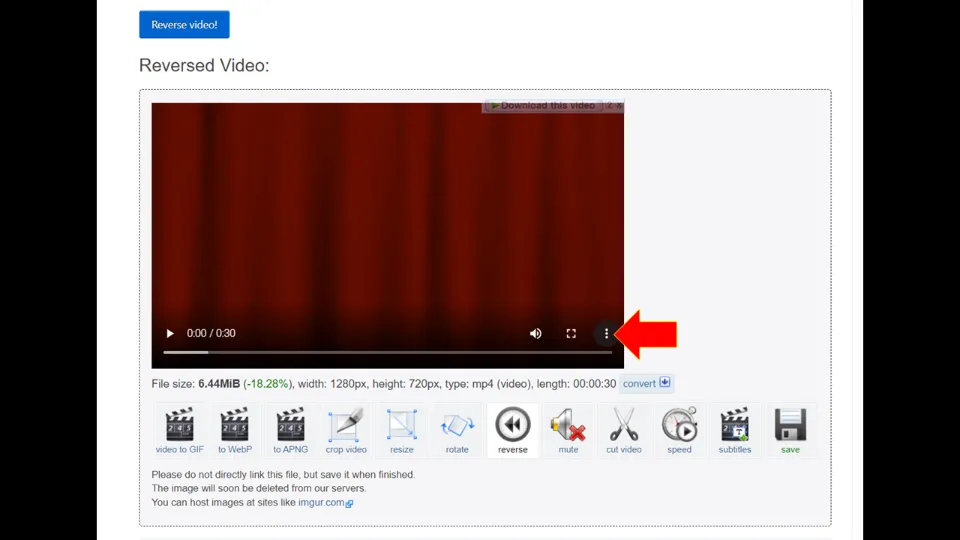
6. Lastly, choose Download option.
2. Clideo
Clideo is another superb online video editor tool that has lots of amazing features. It is one of the few online tools that allows batch processing of videos.
| Supported Platforms | Pros | Cons |
| Any Browser | 👍 Easy to use 👍Batch editing 👍Edit videos without installing any apps 👍Brilliant editor tools and features | 👎Can’t remove watermark without premium subscription 👎Processing time slow compared to offline video editor tools 👎Not suitable for lengthy videos |
Steps to reverse video with Clideo:
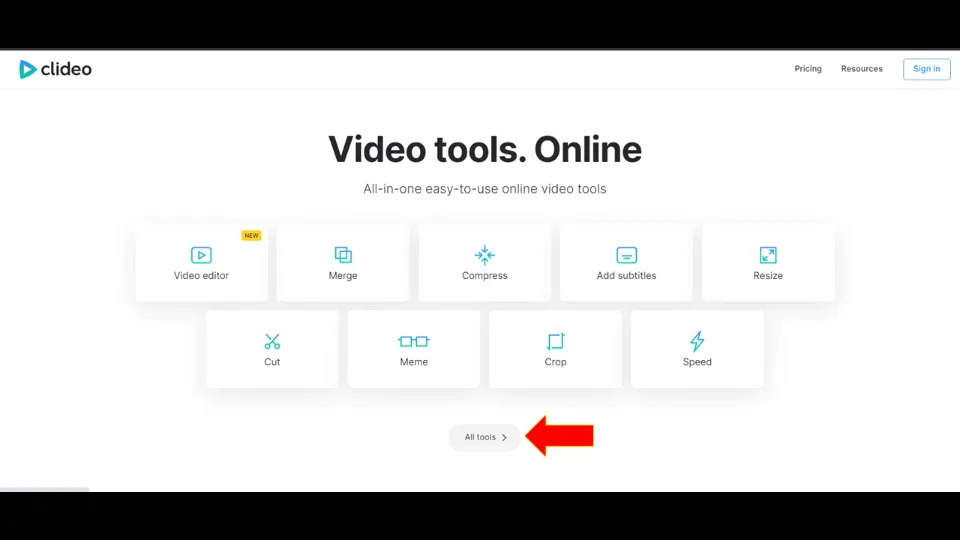
1. Visit official site of Clideo
2. Click All tools option.
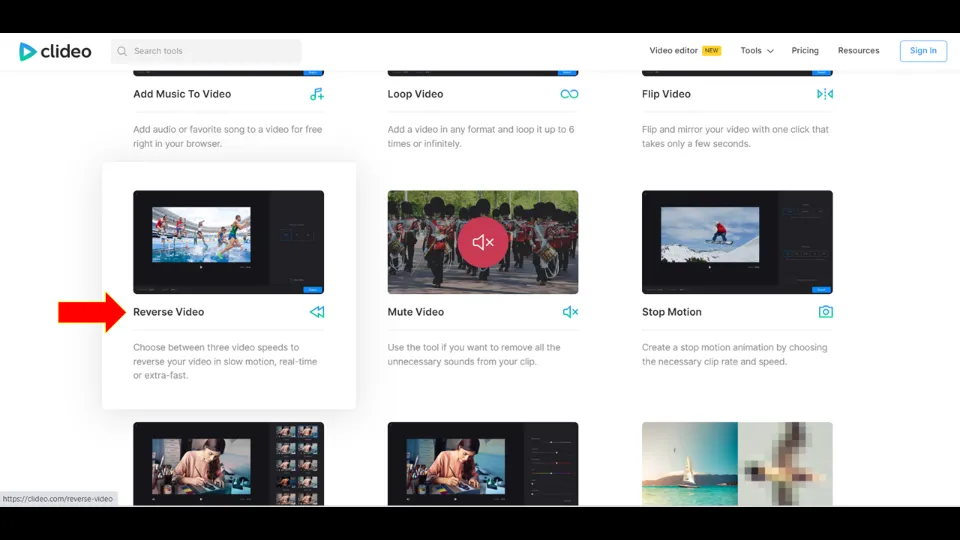
3. Scroll down and click Reverse Video.
4. Click on + Choose files. Then, upload the YouTube video(s) you want to reverse.
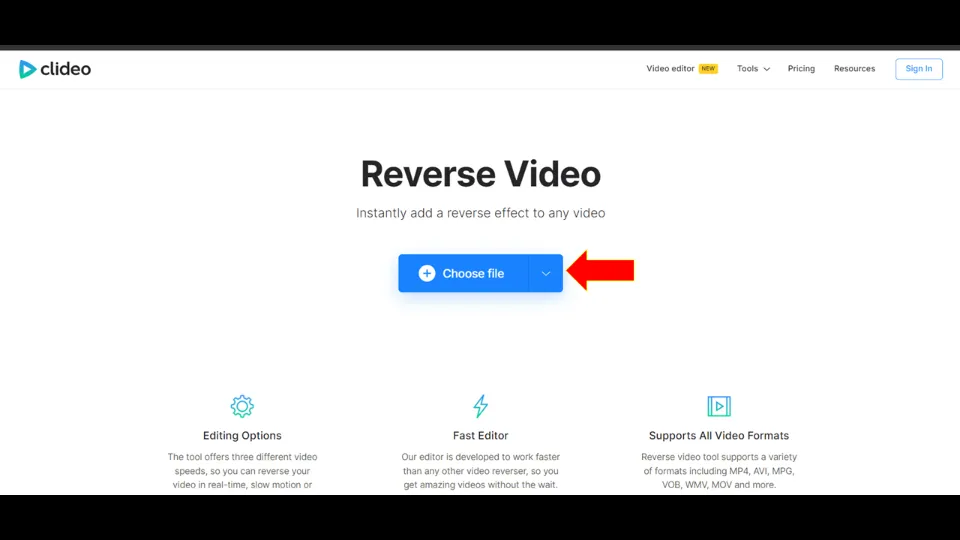
5. Wait for the file to be successfully uploaded.
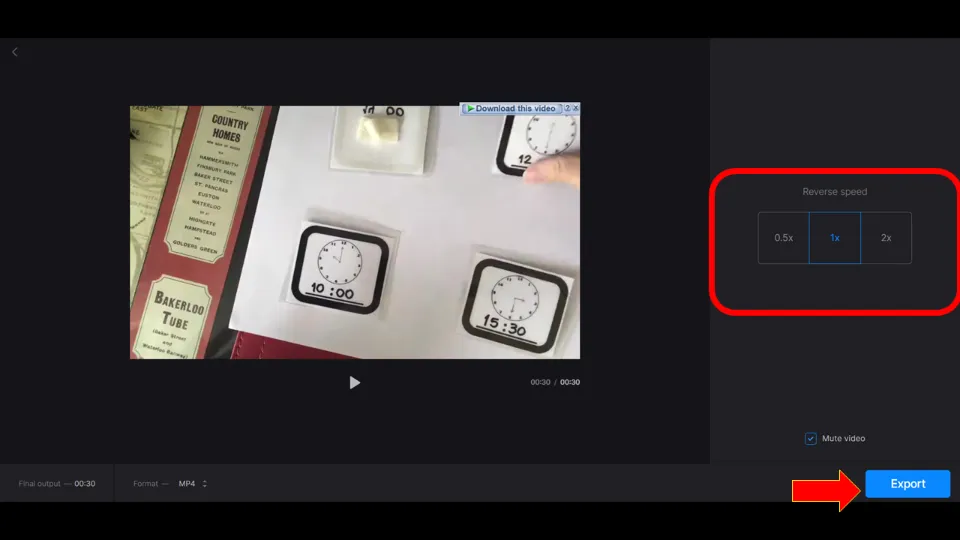
6. Now, select reverse speed (0.5x to 2x). And then, choose video format and whether you want to mute video or not. Finally, click Export.
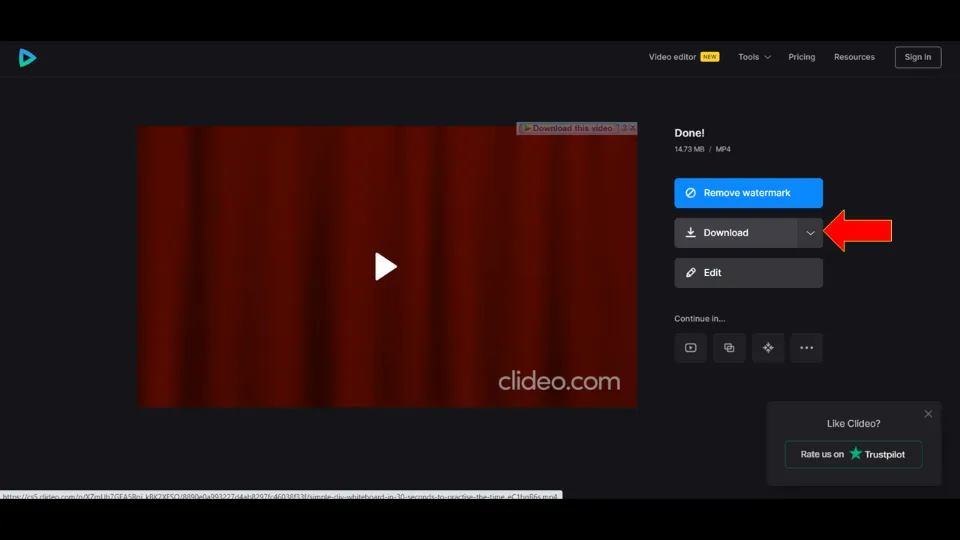
7. After the processing is complete, click Download.
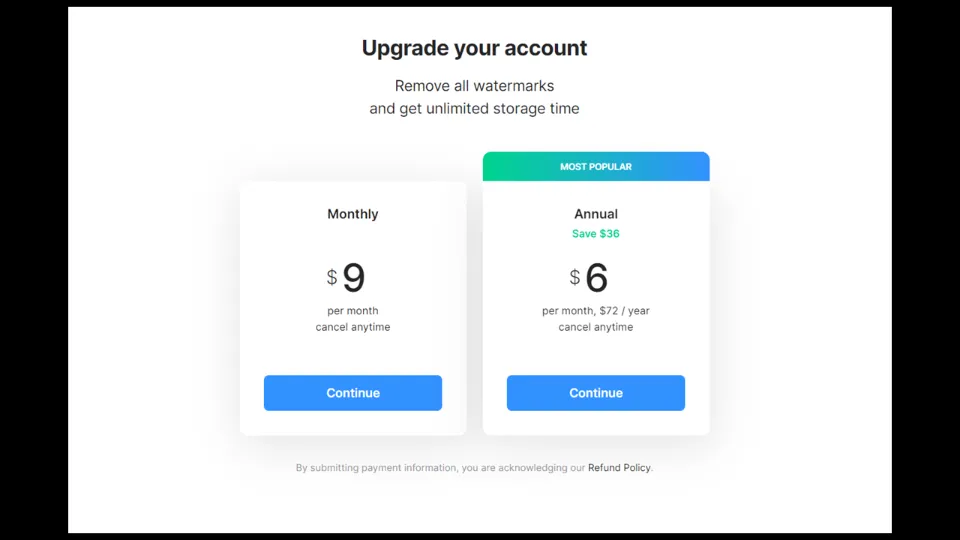
Subscription Model:
The premium version costs $9 monthly and $72 annually.
Premium Benefits:
✅Remove Watermarks
Recap: How to Reverse YouTube Videos
Reversing YouTube video is not that complicated if you have the right tools.
You’ll need to download the YouTube video first. You can use YouTube Video Downloader Sites or YouTube Video Downloader Apps for this.
Then, use either a video editor app(BeeCut) or online video editing tool(EZGif) to reverse the video. Upload the video file and then click the reverse option. Finally, download/ export the output video.
That’s it! Now you can watch the video that you have reversed.
More Resources:
How to Reverse Videos on Android
How to Reverse Videos on Windows