In this article, we will learn how to create a bootable Pendrive. The methods discussed here work on all Windows-supported products and all Windows variants from Windows 7 and above.
We generally use Bootable Pendrive/USB for booting up any system for installing, reinstalling, or repairing any OS (Operating system). People generally prefer to make USB bootable rather than making bootable hard disks as they are easily portable and also cheaper than hard disks.
Your PC generally uses BIOS or UEFI system to install Windows. The BIOS or UEFI are designed to recognize only bootable storage disks, otherwise, it will bypass them. Hence, we need to make the USB bootable. The bootable flash drive should have a master boot record, volume boot record & an executable program/OS.
Planning to create a bootable Pendrive, but does it sound difficult? It’s not. It is very easy actually. You don’t require any technical knowledge to make Pendrive bootable. Just follow any of the methods mentioned below and you are good to go.
We have also discussed how you can unboot a Pendrive in this article.
Precautions that need to be taken care of while creating a Bootable Pendrive
There are certain things you need to take care of before you create a bootable Pendrive. Let’s check them out:
1. The USB drive you want to make bootable should have a space of more than 8 Gigabytes (GB).
2. Furthermore, all the data in the Pendrive should be backed up as these data will get erased in the process and hence, will be unrecoverable otherwise.
3. Remove all the external hard drives connected to the PC except the one you want to make bootable. This is to ensure that you don’t erase other hard drives’ data by mistake.
4. Make sure that your PC has a sufficient percentage of battery. Keeping your PC connected to the charging station is recommended.
5. Be very careful while choosing the drive you want to make bootable (especially when following the CMD method). If you mistakenly select another drive, all the data in that drive will get erased in the process.
How to create a Bootable Pendrive
It is super easy to create a bootable Pendrive. You just need the right tool. In this section, we will talk about four easy ways to create a bootable Pendrive. So, let’s check them out:
How to create a Bootable Pendrive using CMD
It is possible to create a bootable flash drive with Command Prompt. So, let’s learn how to create a bootable USB drive using CMD:
1. Plugin your USB/ hard disk that you want to make bootable.
2. Search for Command Prompt/ CMD with Windows search tool. Then, select Run as administrator from the right side.
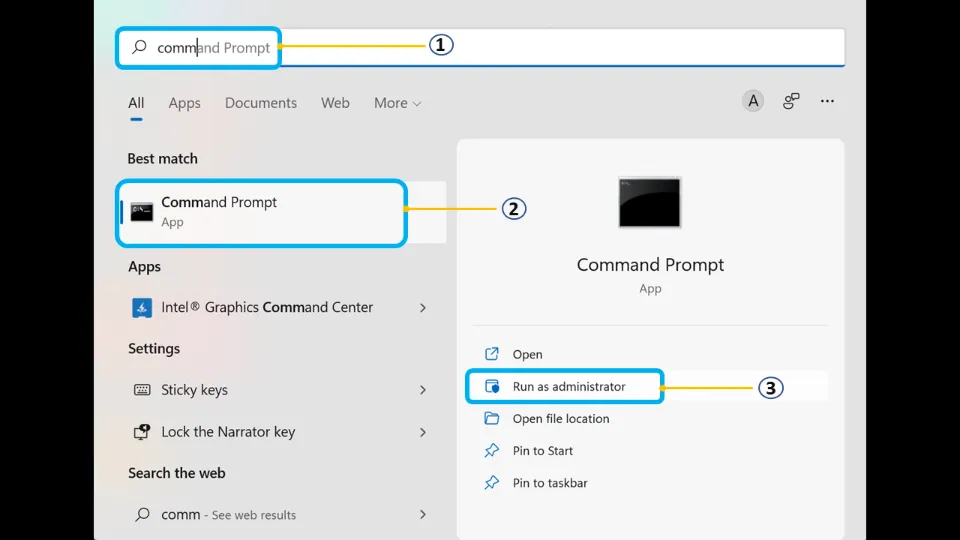
3. Select Yes to allow CMD to run as administrator.
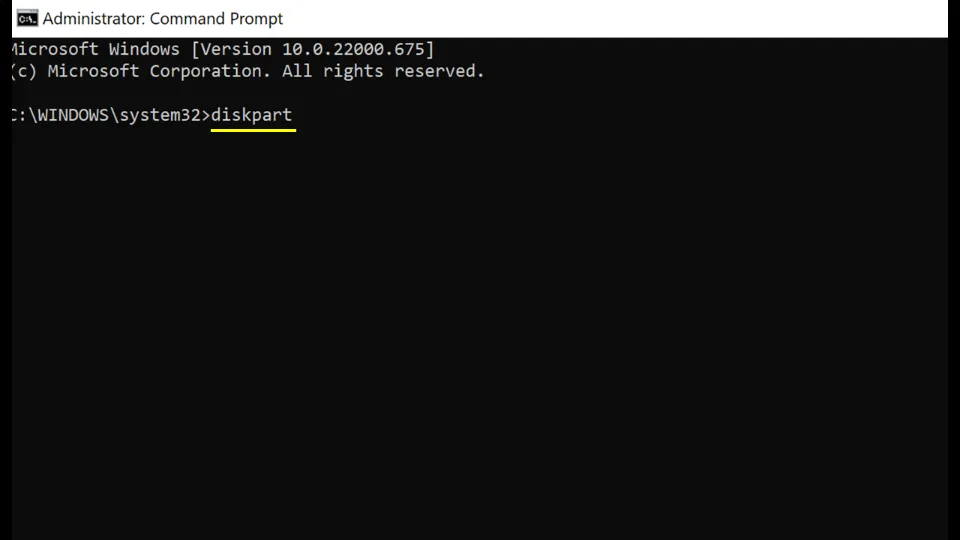
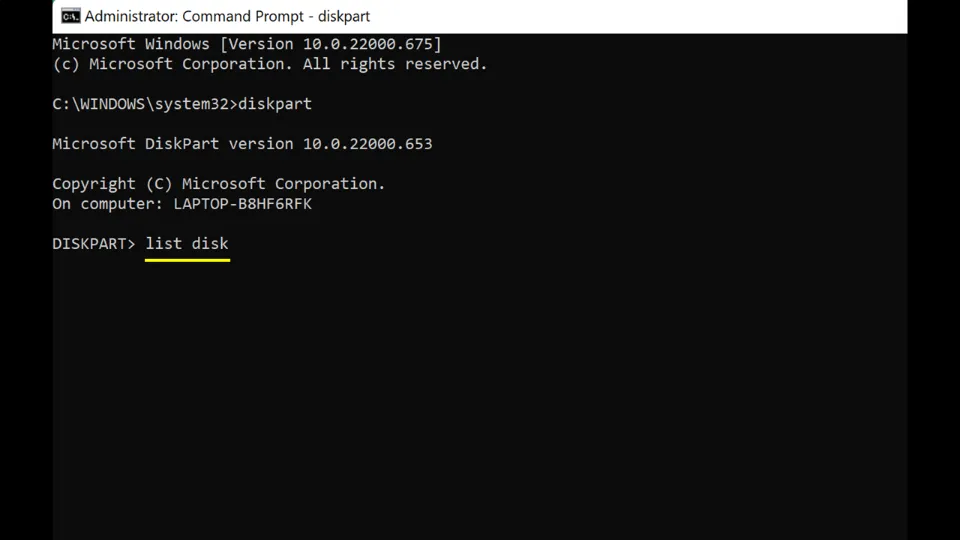
4. Type diskpart & press Enter on the keyboard.
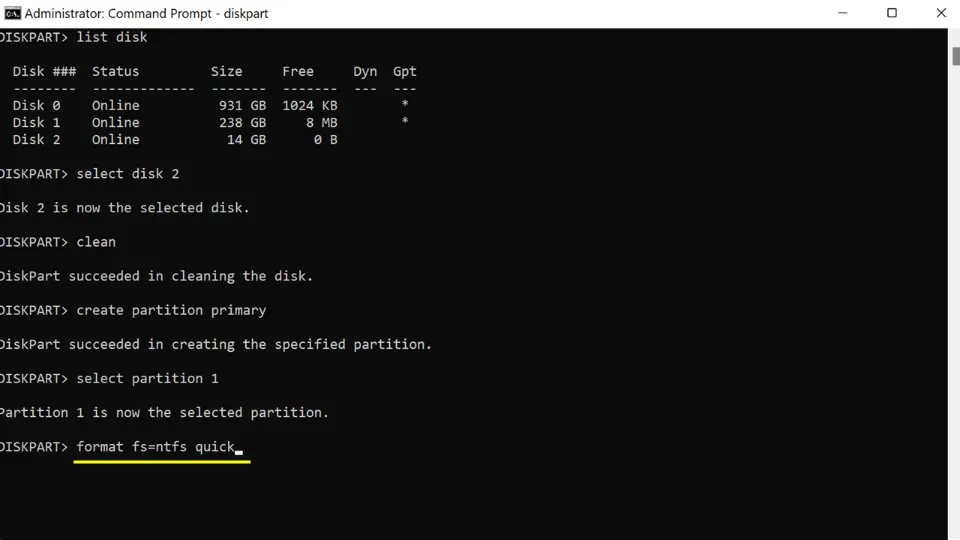
5. Then, type list disk & press Enter. This will show a list of hard drives connected with your PC.
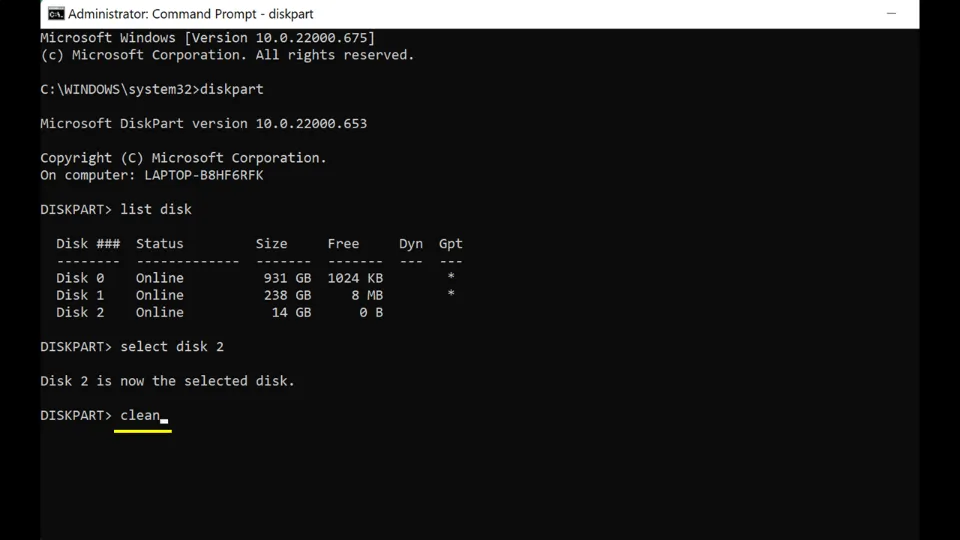
6. Type select disk Z & hit Enter. Here Z denotes disk no. of the hard drive/USB you want to make bootable.

7. Next, type clean & press Enter. It will erase all the data from the selected hard drive.
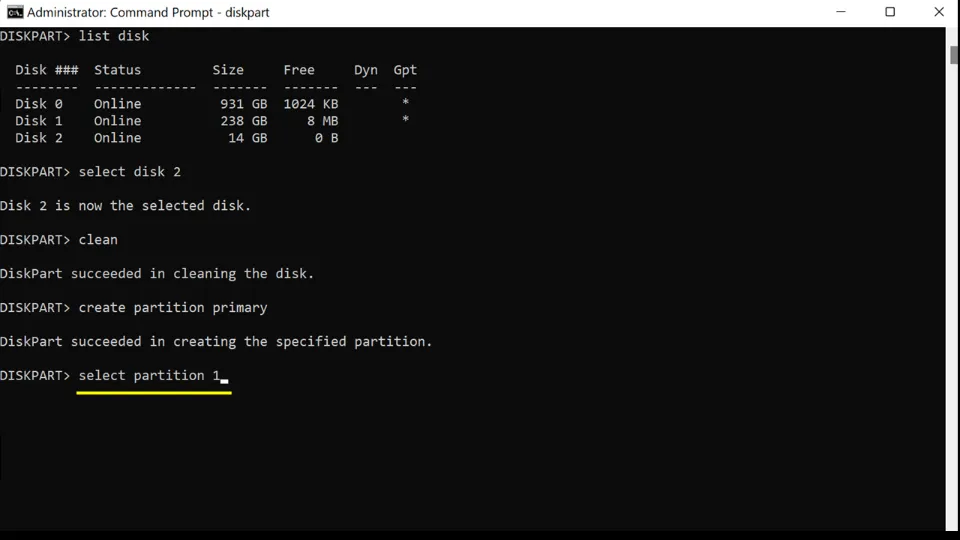
8. Type create partition primary & press Enter again. It will make an all-new partition.
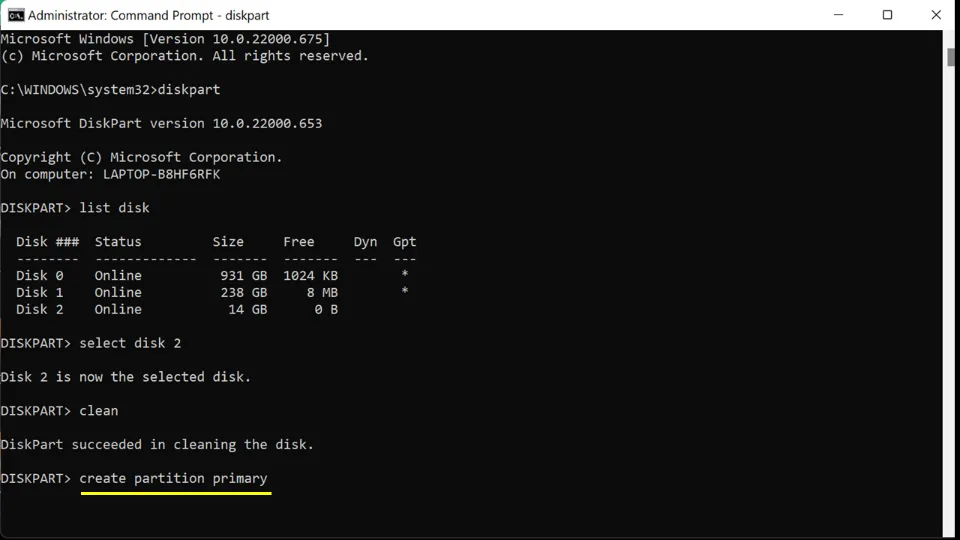
9. Hit Enter after typing select partition 1. It will select the created partition.
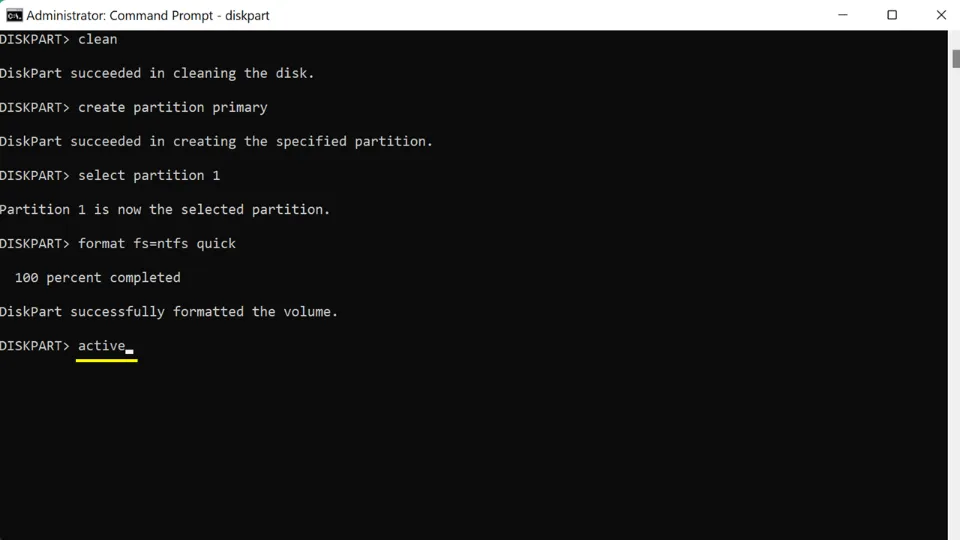
10. Now, we will type format fs=ntfs quick & then hit Enter to quickly format the drive.
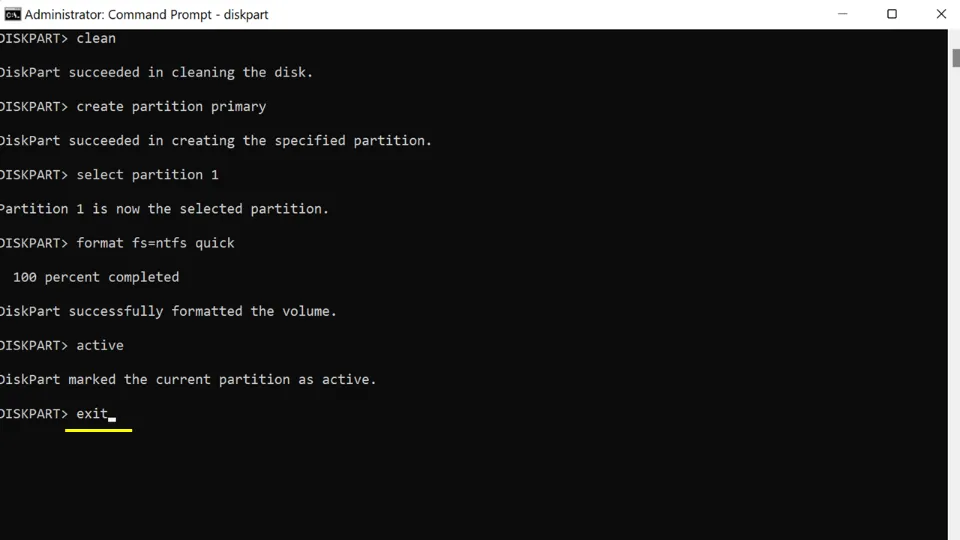
11. To make the partition active, type active & press Enter.
12. Lastly, type Exit & hit Enter once more.
How to create a Bootable USB in Windows 11 with Rufus
Rufus is an application that helps in formatting and creating bootable USB flash drives. Let’s learn how to make a bootable USB thumb drive with Rufus:
1. First of all, install Rufus from Microsoft Store.
2. Plugin the flash drive you want to make bootable on your PC.
3. Launch Rufus.
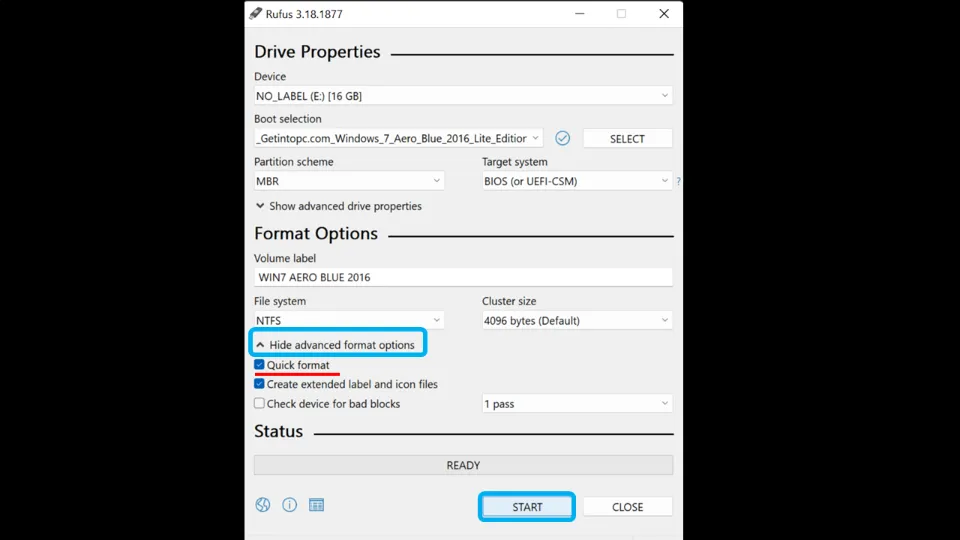
4. Select the USB Flash drive. If there is only one external drive inserted on your PC, it will be automatically selected. Select Windows ISO file (any Windows version you want to install) from your PC under Boot Selection section. Keep the other things as default (i.e. Partition Scheme= MBR, File System= NTFS, Target System= BIOS (or UEFI-CSM), Cluster Size= 4096 bytes ). Then, click START.
Note: In order to format the USB quickly, tick the box next to Show advanced format options. Then, make sure Quick format is selected.
5. When a warning message appears informing you that all data in the selected drive will get erased, click OK.

6. Wait till the process is completed.
How to make Bootable Pendrive and install Windows 11 with PowerISO
PowerISO is an image file processing application that can edit, burn, open, compress, extract, create, and convert ISO files, & mount ISO files with internal disk. It can also create bootable Pendrives. Let’s learn how to create a bootable flash drive with PowerISO:
1. Install PowerISO from its official website.
2. Plugin the flash drive you want to make bootable on your PC.
3. Launch PowerISO.
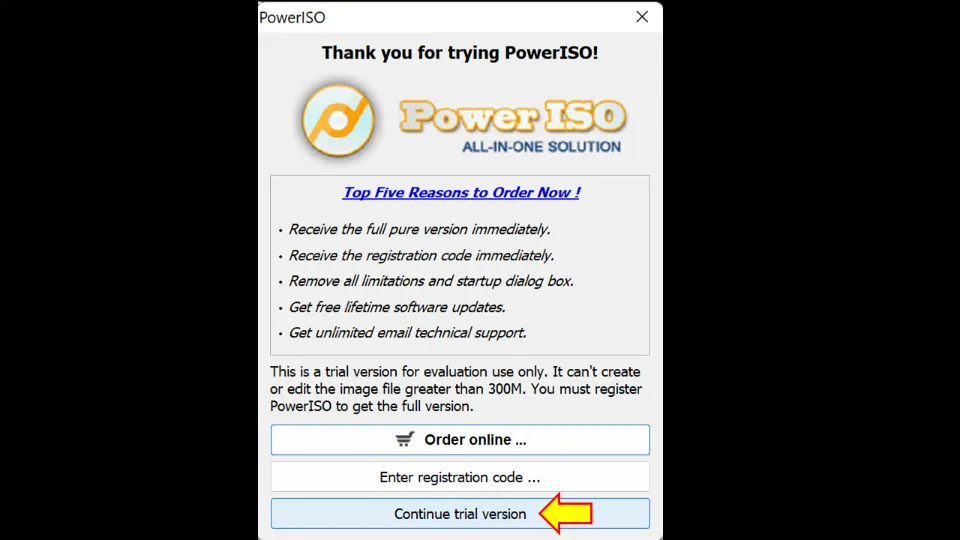
4. On launching this app, it will ask you to get its full version. But, we are just going to use its trial version. Hence, click Continue trial version.
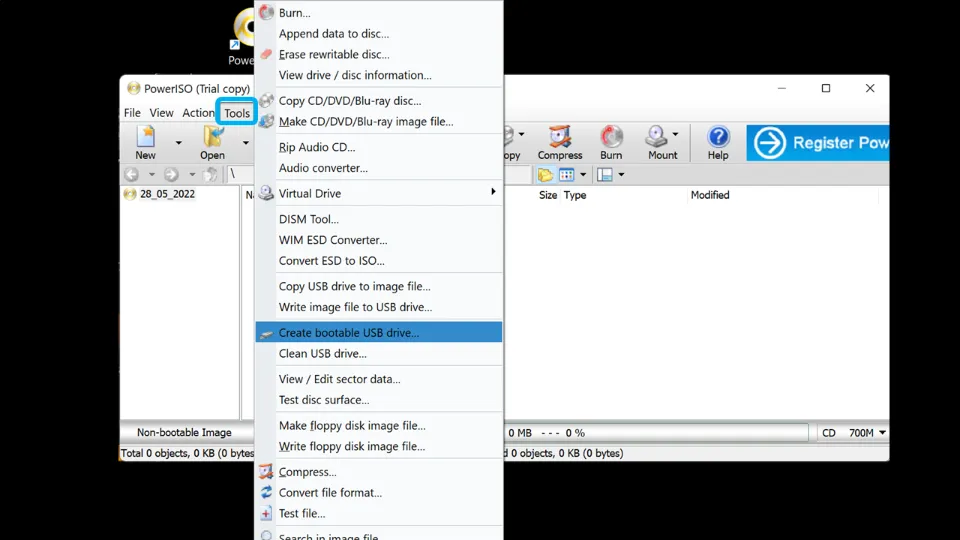
5. Then, hit Tools tab and select Create Bootable USB Drive.
6. It will say that you need to run this app as an administrator to use this function. Click OK.
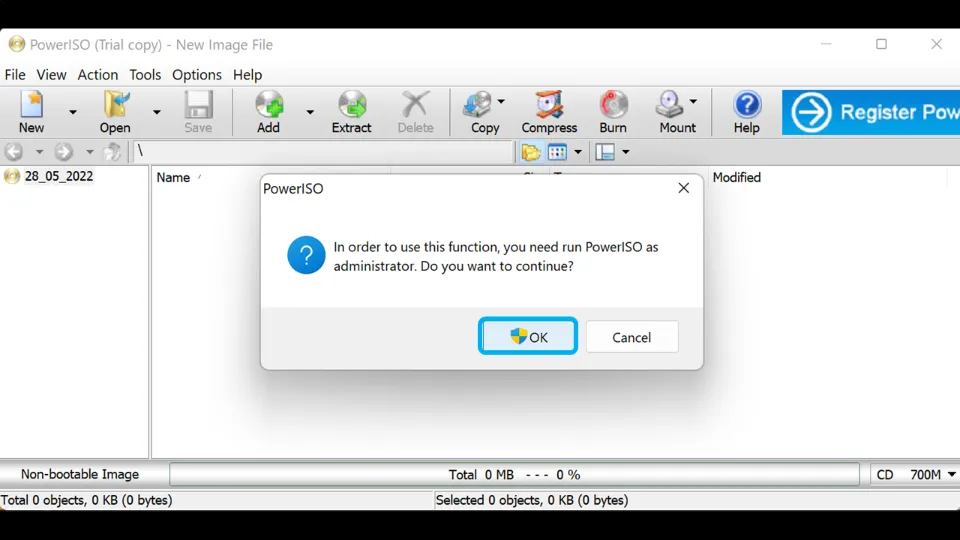
7. Select Yes when this app asks for allowing it to make changes to your device.
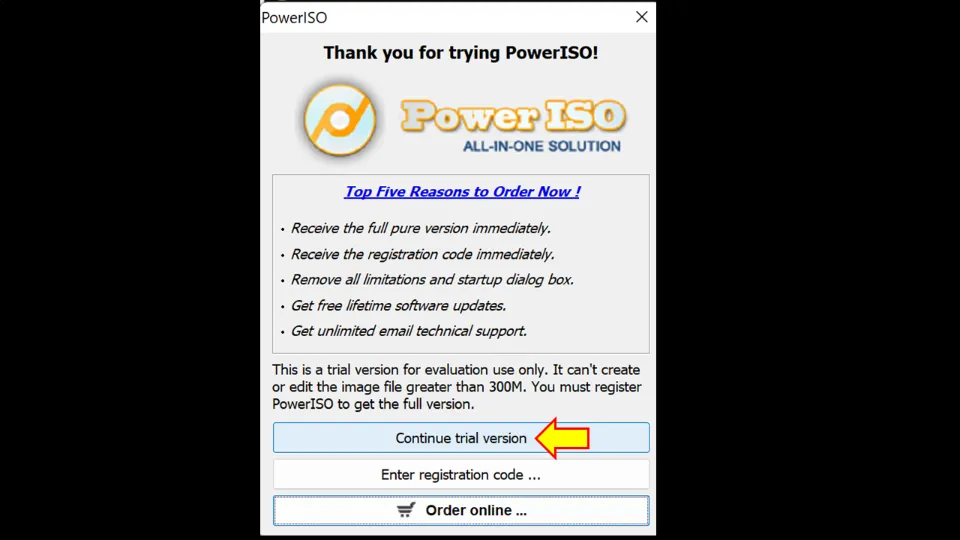
8. Again, click Continue trial version when the same previous window opens again.
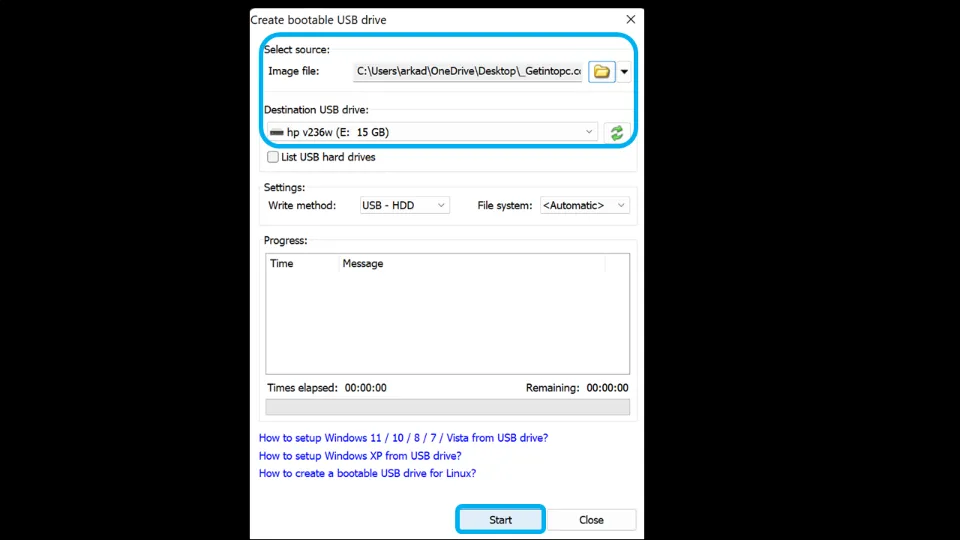
9. Select source i.e. Windows ISO file from your PC. Also, select the flash drive. Then, click Start.
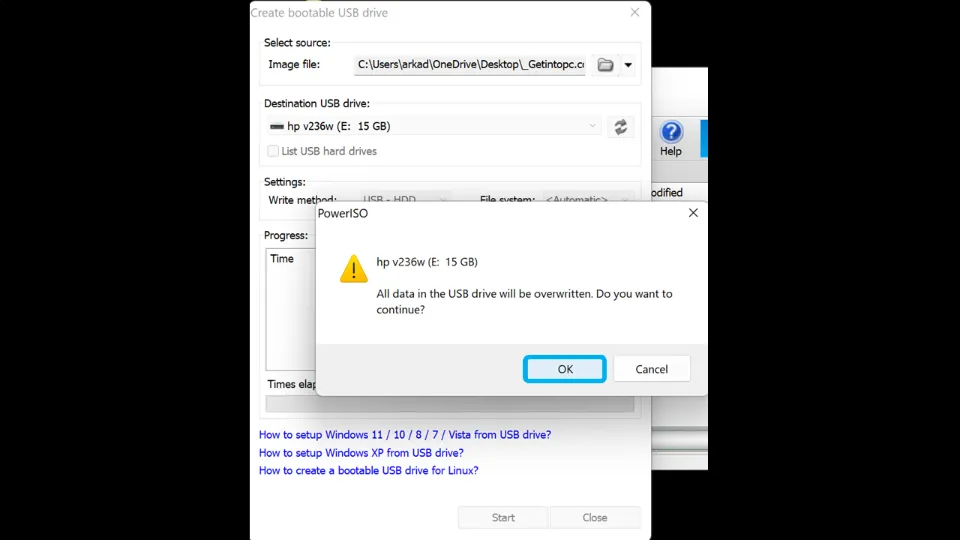
10. A warning message will appear informing you that all data in the USB drive will get erased. Click OK.
11. Wait till the process is completed.
How to create a Bootable Pendrive for Windows 11 with Universal USB Installer (UUI)
Universal USB Installer (UUI) is a very good Bootable USB Creator app. It allows users to easily Boot from USB. Let’s learn how to create a bootable USB drive with UUI:
1. Install UUI. It will automatically launch.
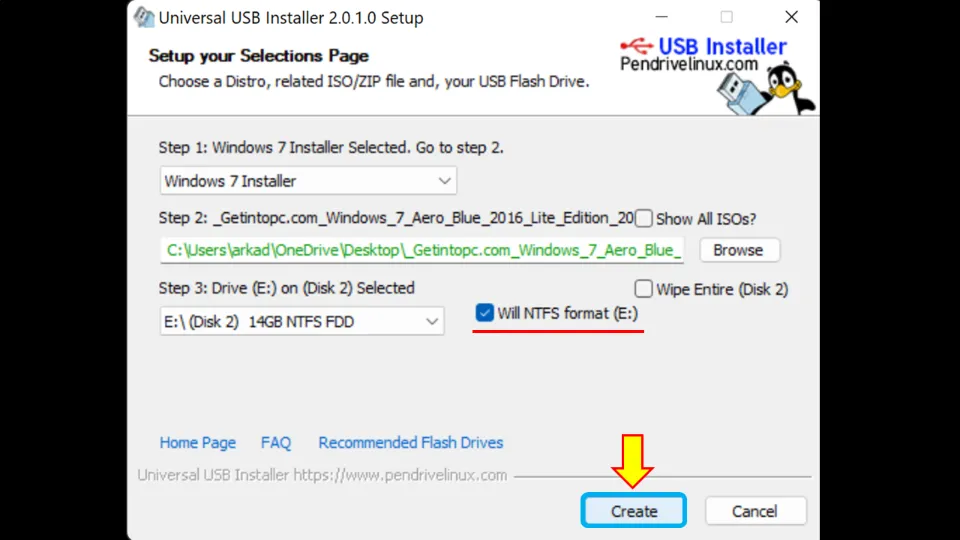
2. Now, select which Windows version you desire to install. Then, manually browse the ISO file of the selected Windows. And choose the drive you want to make bootable. Finally, select Create.
Note: Don’t forget to select NTFS format.
3. The process will be completed within a few minutes. The time will depend on the size of ISO file.
How to make a Bootable USB normal again
Although there are many ways to make a bootable USB normal again, we will discuss two easy methods to accomplish it. In all the methods, the main priority is to format the drive. Let’s check the methods:
Method 1: Via File Explorer
Here are the detailed steps:
1. Start File Explorer by clicking its icon.
(Shortcut: Press Win and E keys on keyboard simultaneously. It will start File Explorer immediately.)
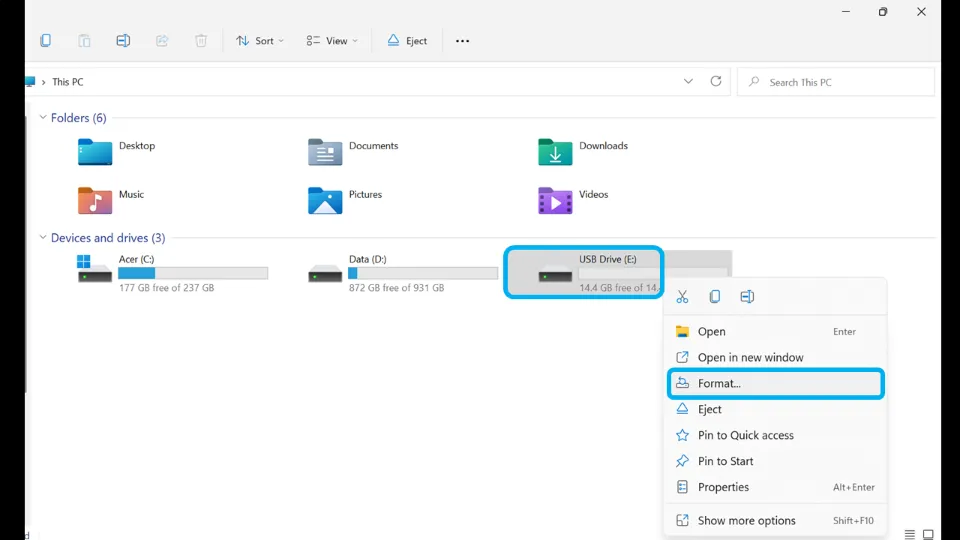
2. Find the bootable drive from the list of drives available in This PC section.
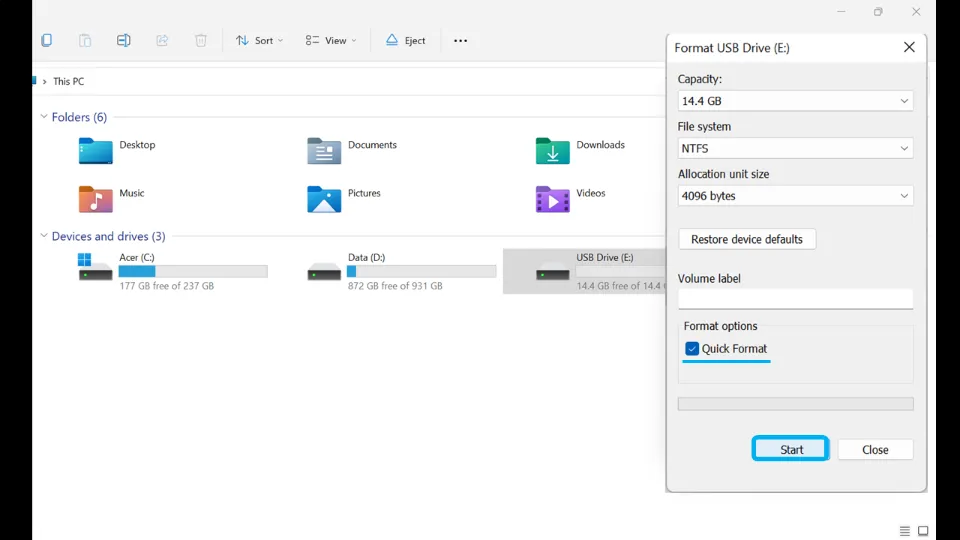
3. Right-click the drive and choose Format.
4. Next, keep the default parameters as it is (i.e. File System= NTFS, Allocation unit size= 4096 bytes). You can click Restore device defaults also if you want. And make sure Quick Format is selected. Then, click Start.
Method 2: Via Disk Management
Here are the detailed steps:
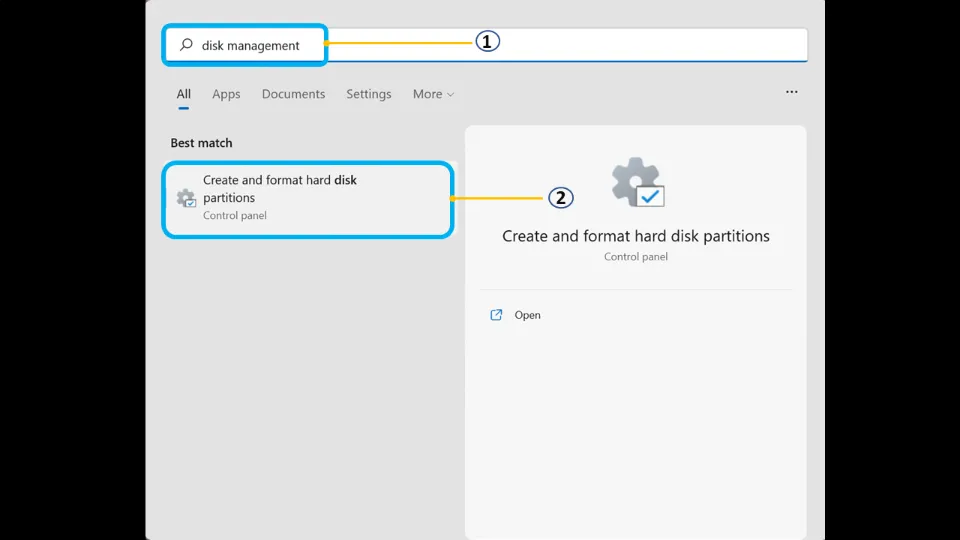
1. Search for Disk management with Windows search tool. Then, click Create and format hard disk partitions to start it.
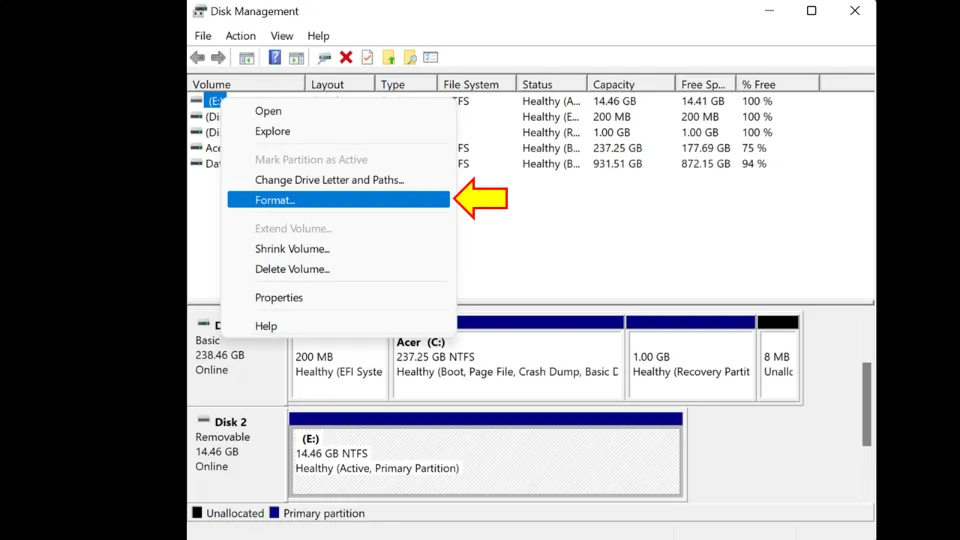
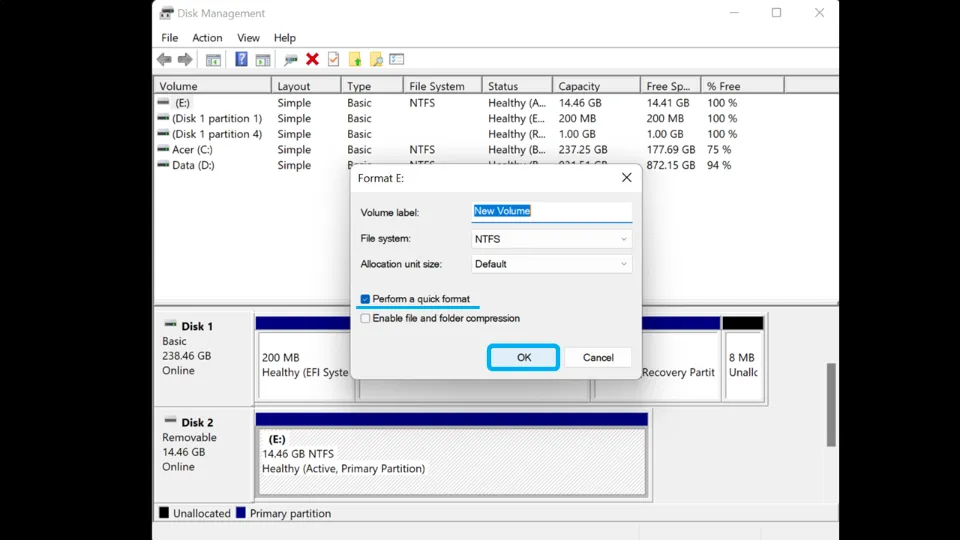
2. Choose the bootable drive. Right-click it and hit Format.
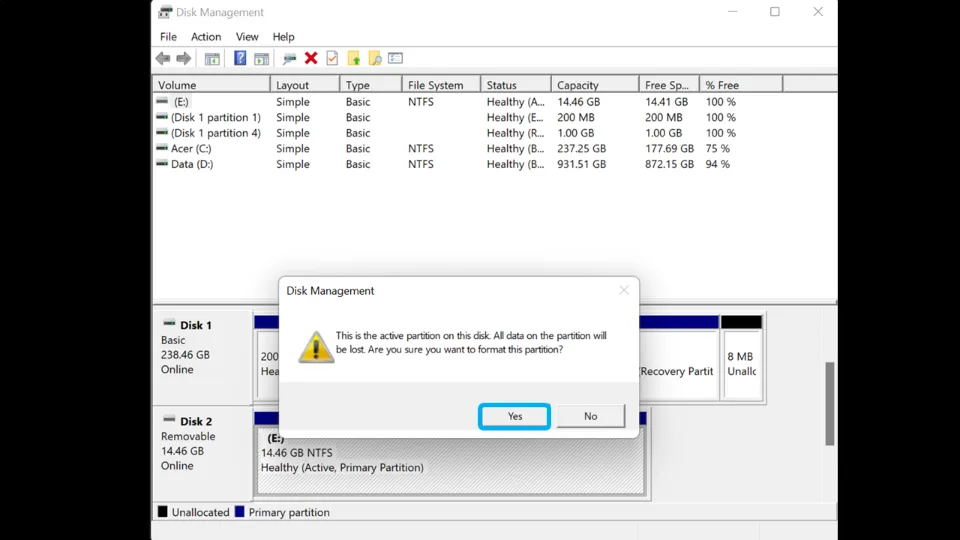
3. A warning will tell you that all data in the selected drive will get deleted. Select Yes.
4. Keep File System as NTFS and Allocation unit size as Default. Make sure to tick the box next to Quick Format. Then, hit OK.
Winding Up
Now that you have made your Pendrive bootable, you can easily install Windows from it. To do it, insert the flash drive into your PC. Restart your PC and press the key (Esc, F12, or F10 key of PC keyboard) that launches the boot selection menu. Finally, choose the option that boots it from USB Pendrive.
I recommend using Rufus app to create bootable Pendrive. All the other methods discussed above are also quite simple and you can give them a try.
For any other queries, drop a comment below!
Frequently Asked Questions
How can I make a Pendrive bootable?/ How do I make a USB drive bootable for Windows 11/10?
You can use Rufus application, Universal USB Installer, PowerISO, or Command Prompt to make a Pendrive bootable. In the case of Universal USB Installer or UUI, launch the app first. Then, Now, select Windows version and drive. Add the ISO file of the selected Windows. Choose NTFS format. Lastly, hit Create.
How can I make a bootable Pendrive for free?/ How to create a bootable USB iso?
Install Rufus app. Select the USB Flash drive and then choose Windows ISO file. Keep all the other auto-selected parameters as it is. Then, hit START. Finally, click OK and let the process complete.
Can I install Windows from Pendrive?
Yes, you can install Windows from Pendrive. Make the Pendrive bootable first, and then install Windows from the Windows ISO file in the Pendrive.
Which Pendrive is best for bootable?
Any Pendrive that has a size of more than 8 GB is suitable for creating bootable Pendrive.