Minecraft regularly receives new updates to ensure players have the best gaming experience. In today’s guide, you will learn how to update Minecraft on Windows 11.
Minecraft, a sandbox game (the one without any agenda or missions), has an equal fan following amongst grownups and children. The flexibility of playing at one’s own terms and own pace is what makes Minecraft a favorite for millions.
And keeping the game updated is a ritual for serious enthusiasts. Timely updates of the game are what keep the players interested. So, in today’s post, we will learn how to update Minecraft in Windows 11.
Why Update Minecraft on Windows 11?
New versions of Minecraft provide various updates, including new items and palettes. Several new entities and other features will also appear in the game as it receives regular updates.
Here are a few important reasons to update Minecraft on Windows 11:
- To get new skins, adventure maps, and features.
- To fix bugs.
- For better game stability.
Minecraft Usually Updates Automatically
The most common way to update Minecraft on Windows 11 is to start the game up as per usual. The Minecraft program will identify the latest version of the game when you start it up.
The game will then download the new update. You might have to exit the game to allow the program to automatically install the new features. The newest version of Minecraft will be up and running on your device after that.
What If the Automatic Minecraft Update Work?
Sometimes the Minecraft program may not get its automatic update. In such cases, you need to make intervention and update Minecraft on PC and other devices.
How to Update Minecraft on Windows 11
The good news is that it’s easy to update Minecraft on Windows 11 operating system. Here’s a look at what you can do to get the program up and running.
Broadly, there are two ways for updating Minecraft or any other app; the first is downloading and installing updates from Store, and the second is reinstalling the game/app if the first method doesn’t work.
How to Tell Which Minecraft Version You Have
Each version of Minecraft can be updated in two ways, with a slight difference in the steps to be followed. So, knowing the version of the game installed on your Windows is important.
Minecraft comes in two editions:
1. Java edition:
The original version, which was designed to run solely on PC;
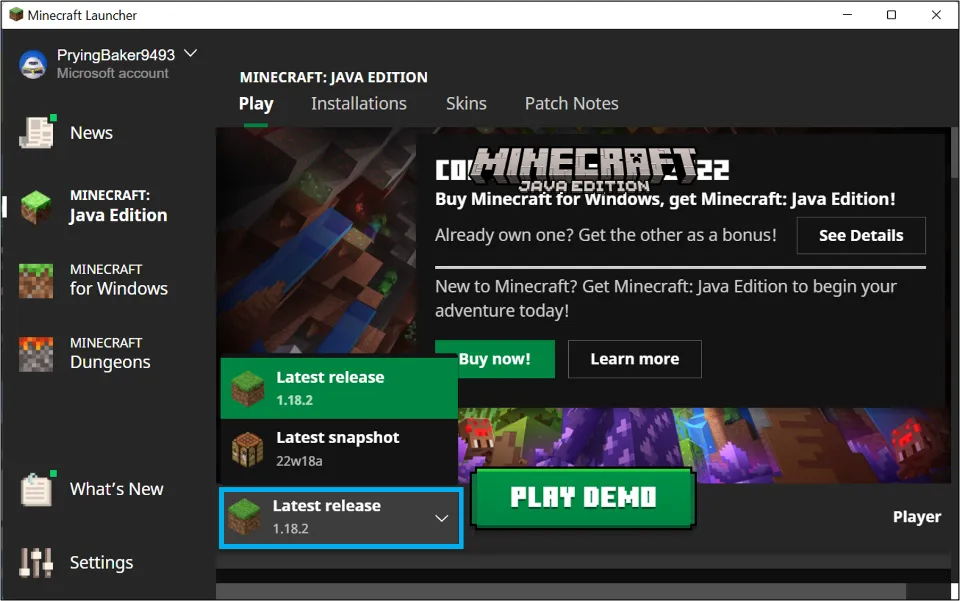
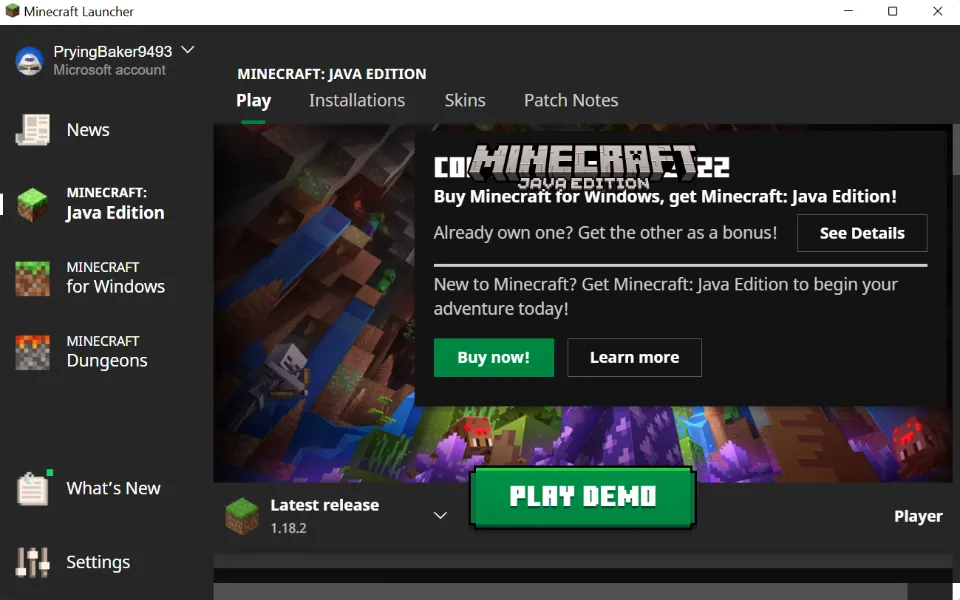
On Java edition: You can find out the version of Minecraft by going the Minecraft launcher and looking at the bottom left corner. The version of the program will be displayed there. Plus, you can review all the available versions with the newest ones appearing first.
2. Bedrock edition:
Released in 2017, after game developer Mojang was acquired by Microsoft; designed to run on smartphones, tablets, Xbox consoles, and PC.
On Bedrock edition: To find the installed version, open Minecraft. Look at the bottom right corner, the version number will be mentioned there.
How to Update Minecraft Bedrock Edition on Windows 11
Let’s find out how you can update Minecraft Bedrock Edition on Windows 11.
Method 1: Update Minecraft Bedrock Edition from Microsoft Store.
Here’s how to change Minecraft version windows 11 from Microsoft Store:
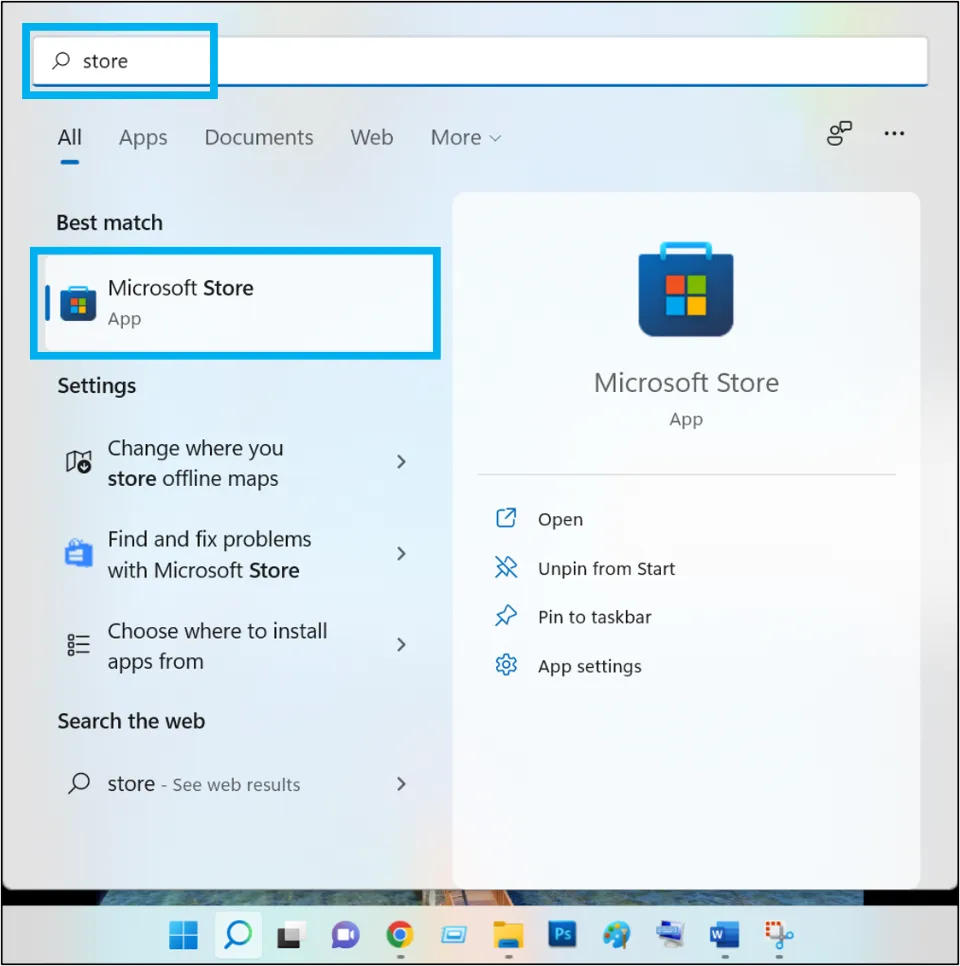
1. Open the Search feature, by hitting its icon on the taskbar.
2. Type Store, then proceed to click on Microsoft Store below
3. On the lower left side, find the option of Library and click on it;
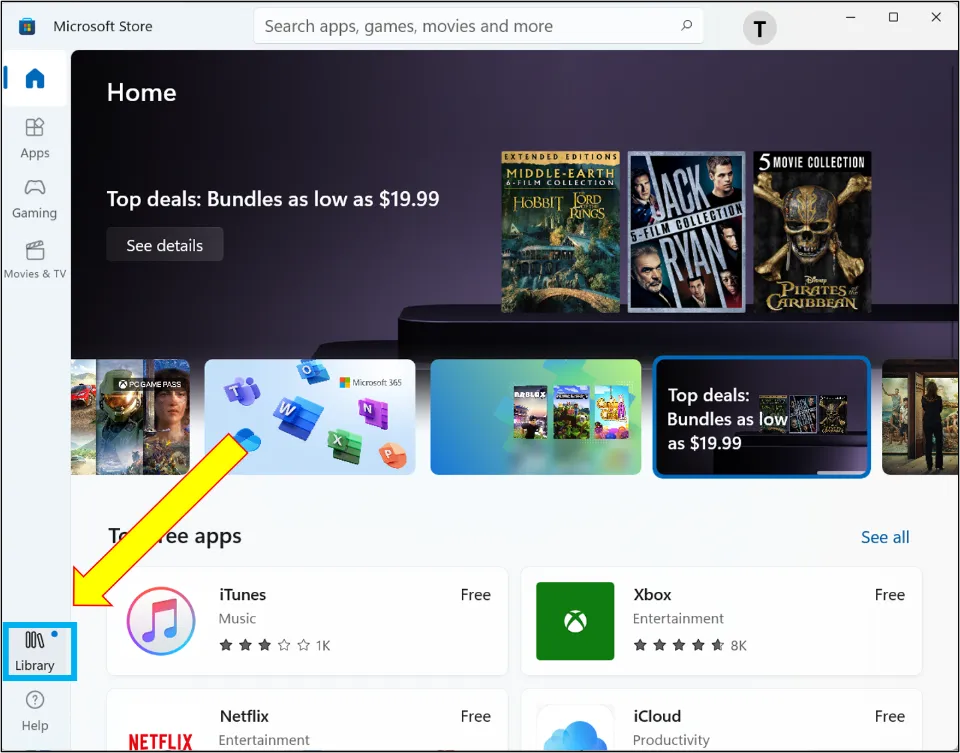
4. The list of all apps installed using the Store will open on the right side.
On the top right side, there will be a Get updates tab. Go for that.
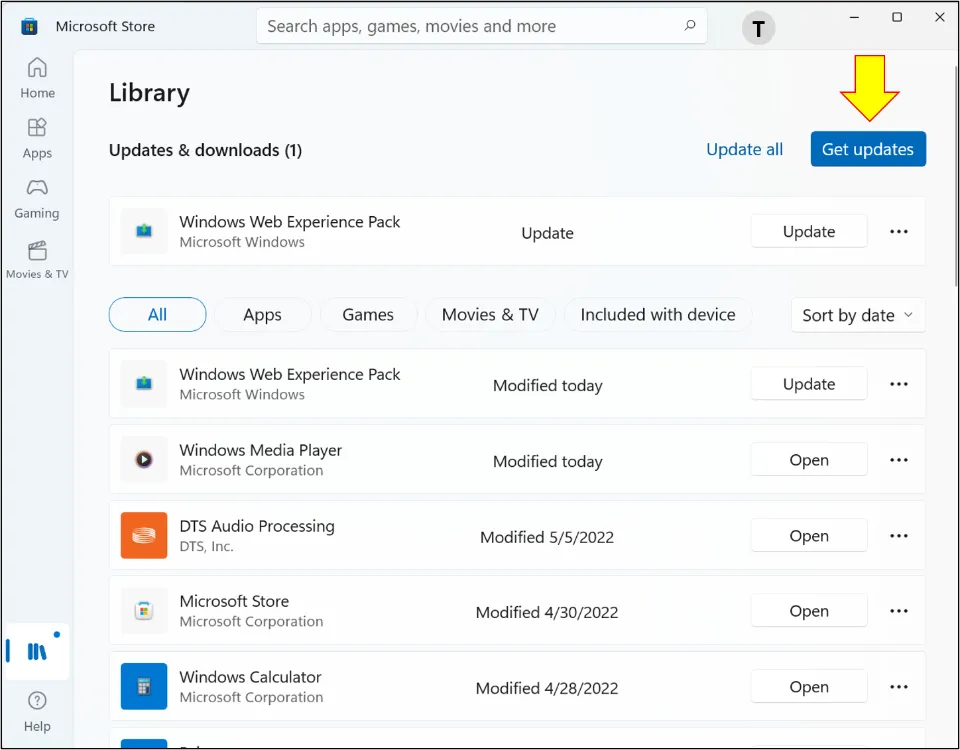
5. If any updates are available, they will start to download.
Repairing the Store App to Receive Updates
If the Microsoft Store app is not picking updates properly, then it could also hinder the updating of other apps installed on the system including Minecraft. This can be resolved by repairing the Store app, as detailed below:
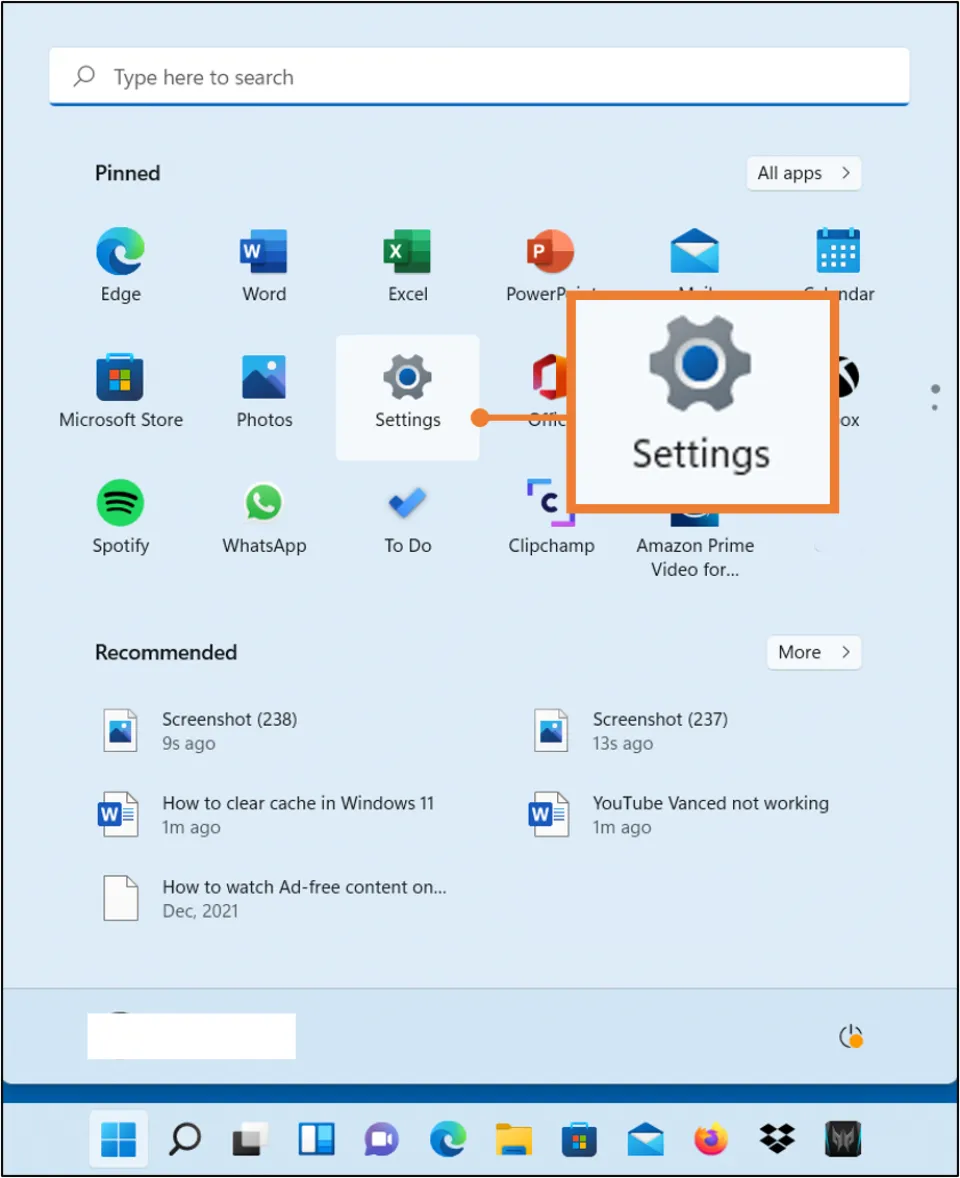
1. Press the Start Menu button on the taskbar.
2. Click on Settings.
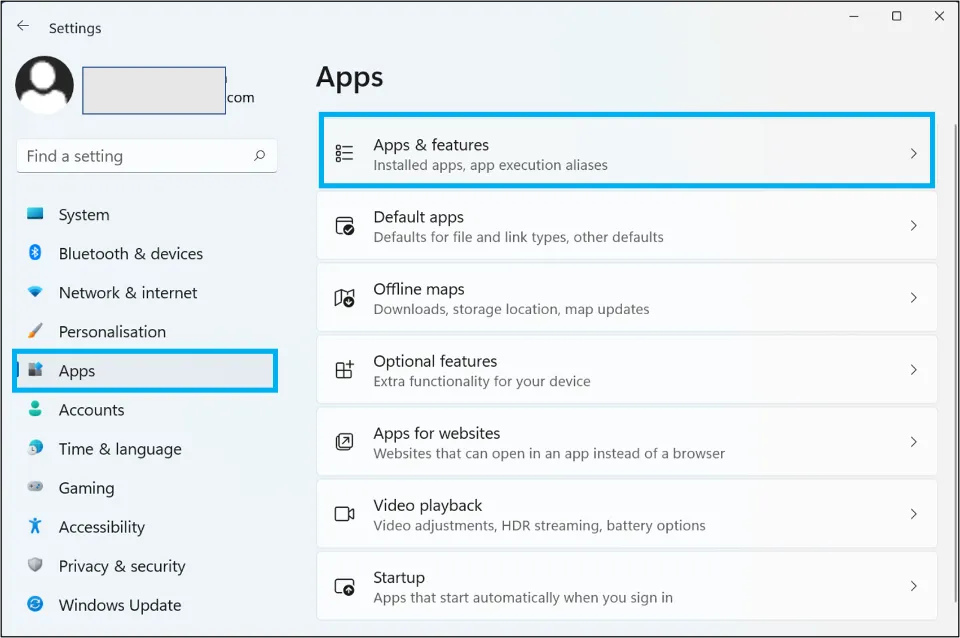
3. On the left side, go to Apps.
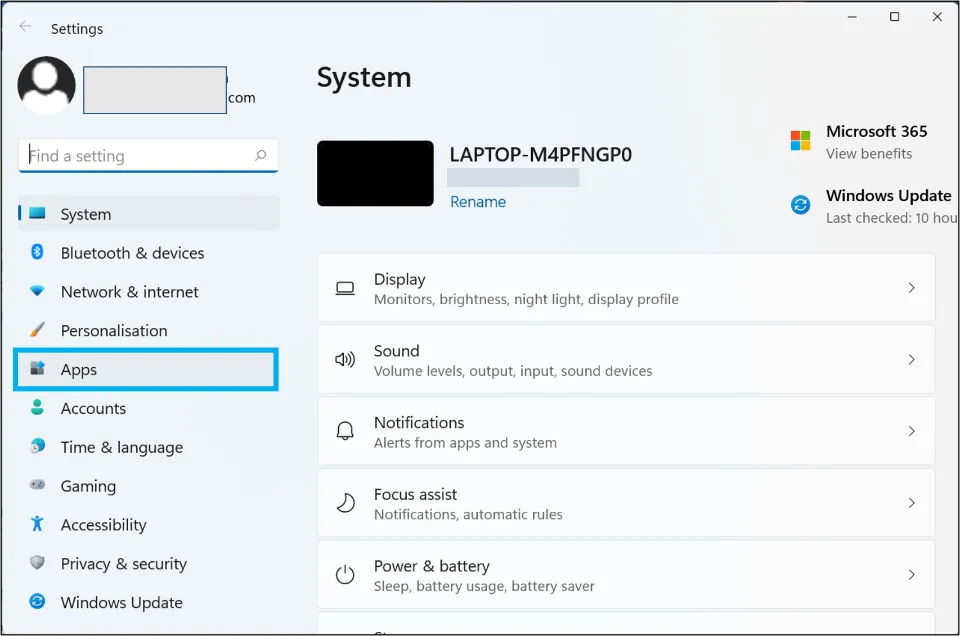
4. Hit the Apps and features option in the right panel.
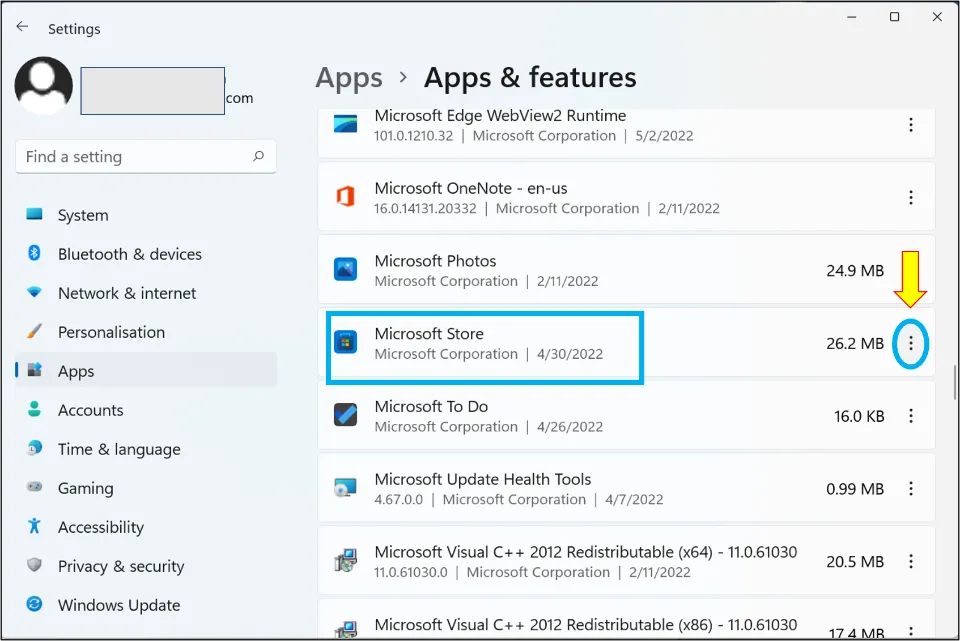
5. Locate Microsoft Store in the list of apps. Click on the 3 vertical dots button, adjacent to it.
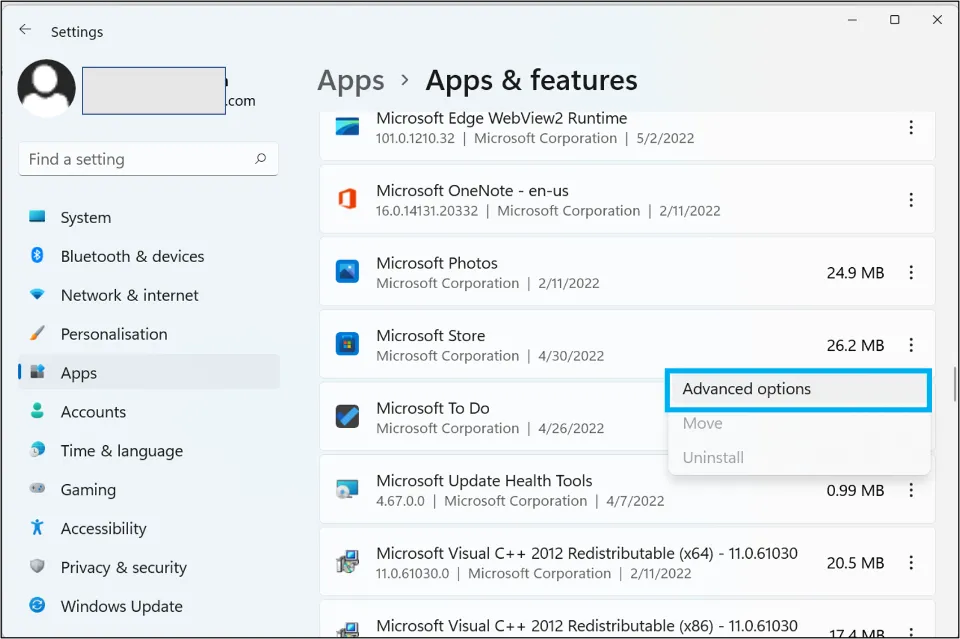
6. In the small window that appears, left-click on the Advance options.
7. Click on Repair.
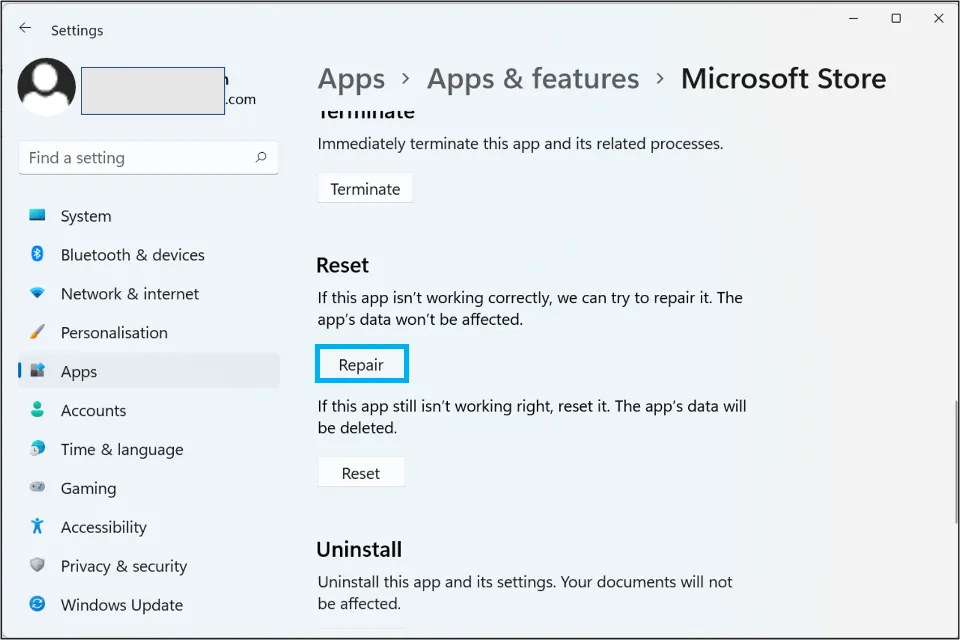
8. After the repair, go to Microsoft Store again to update the game by repeating the process mentioned in method 1
Method 2: Enabling Auto-Update in Store
When you don’t want to manually update each app, the following steps can be taken to update minecraft for windows 11:
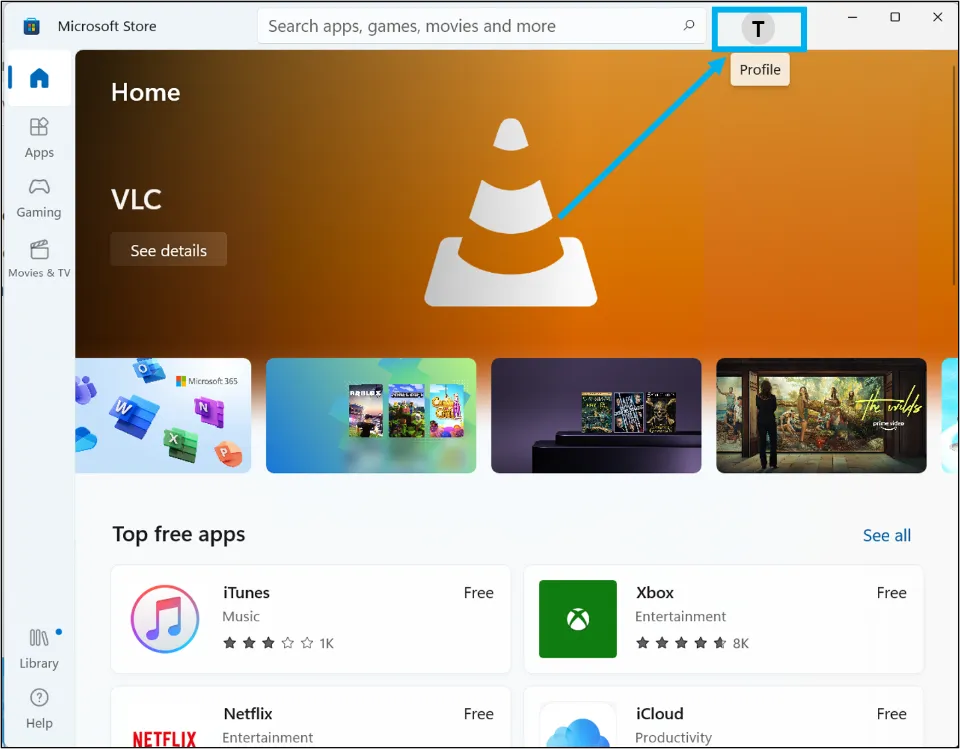
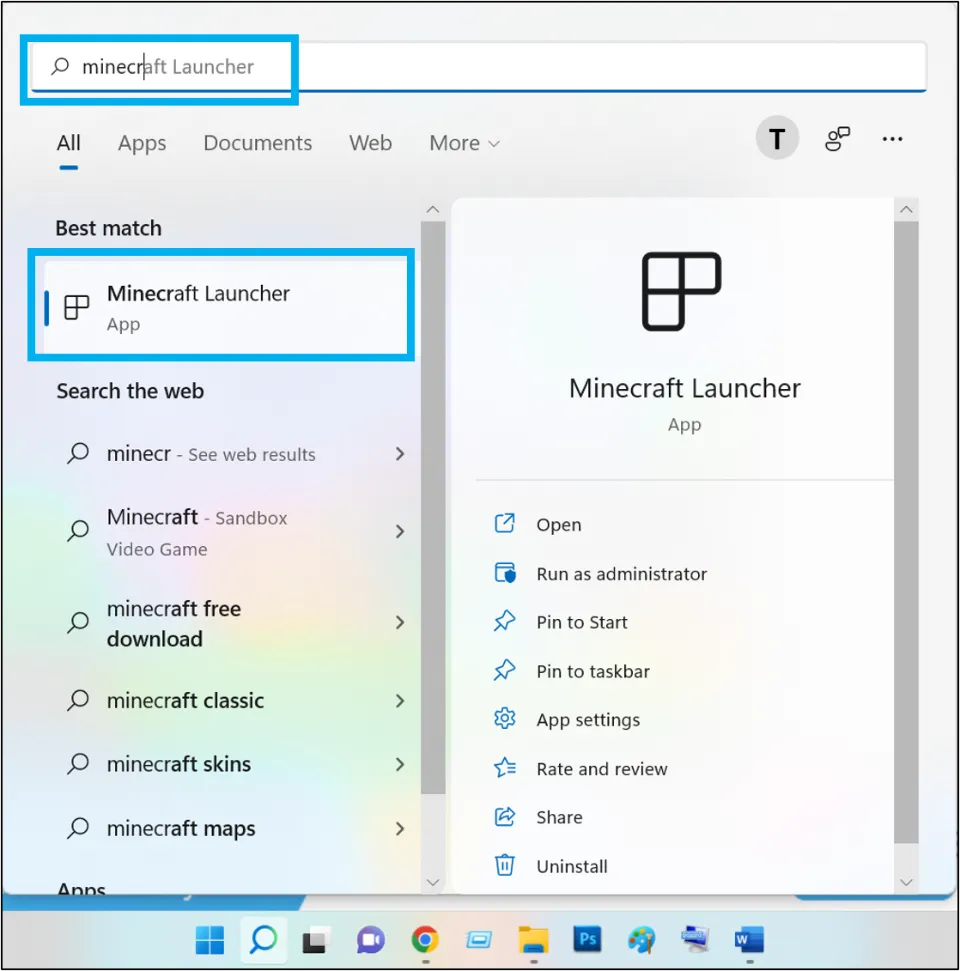
1. Gain access to Store, by searching it up using the Windows Search feature.
2. Reach out to Profile Icon on the top right side.
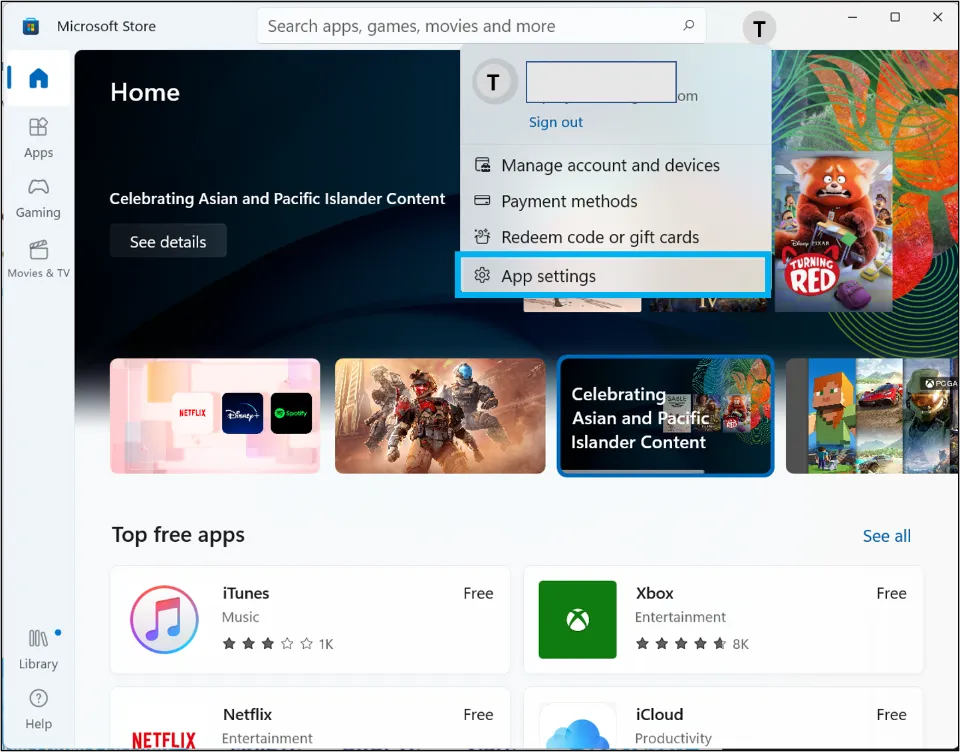
3. Go to App settings.
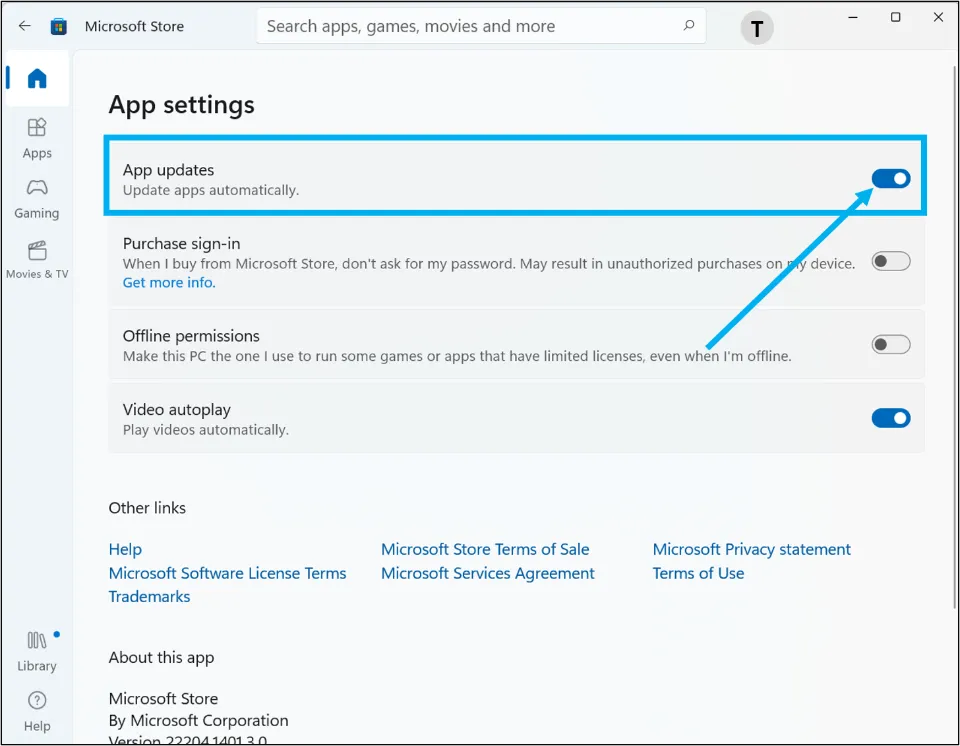
4. Turn ON App updates option. It will update apps automatically without any prompt from the users’ side.
Method 3: Reinstall the game
If the game doesn’t get updated by the above methods, the last retort (and a sure shot!) is to uninstall the old version and install the latest version from the game’s website.
1. Press the Start Menu button on the taskbar.
2. Click on Settings.
3. On the left side, go to Apps.
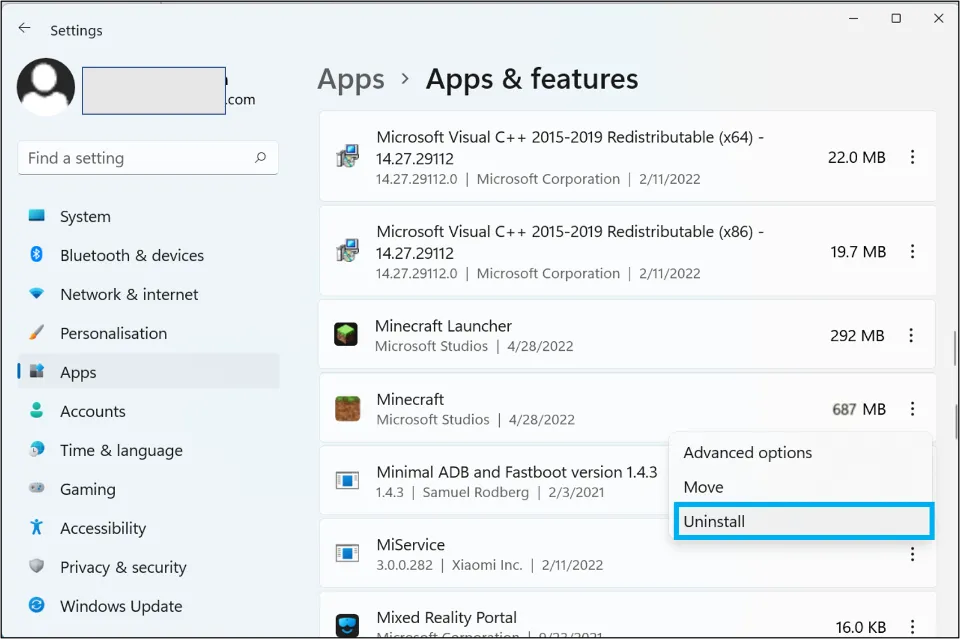
4. Hit the Apps and features option in the right panel.
5. Locate Minecraft in the list of apps. Click on the 3 vertical dots button, adjacent to it. In the small window that appears, left-click on uninstall.
6. Restart your system.
7. Visit the Microsoft Store.
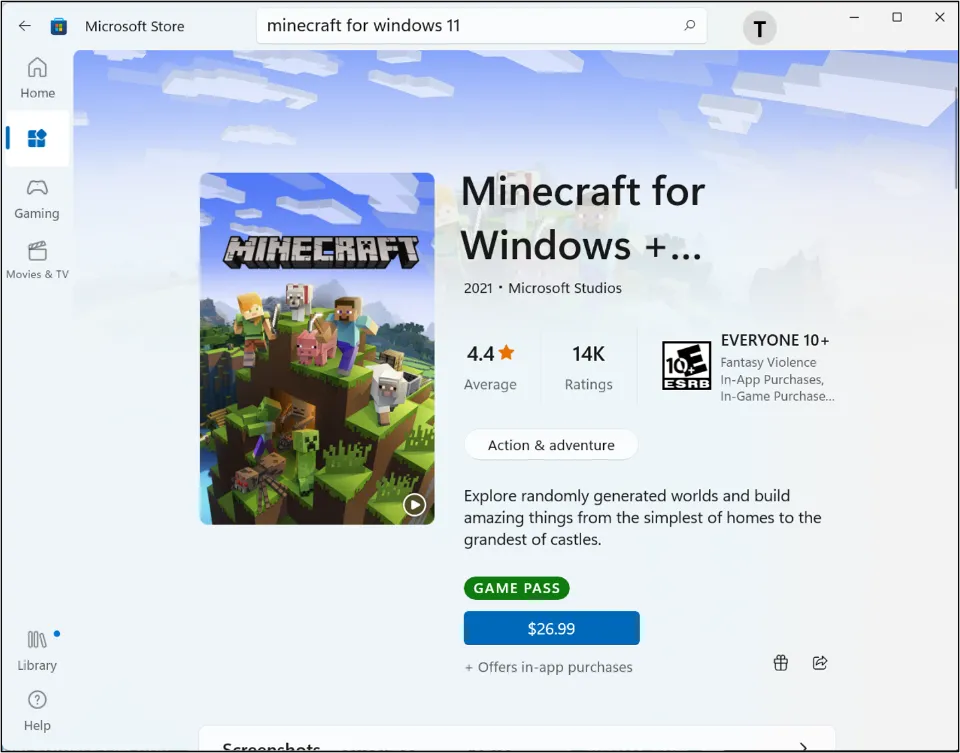
8. Search for Minecraft in the Store.
9. Press the Get download it or $26.99 button to purchase it. Install the App and/or Launcher
10. Open the Minecraft launcher.
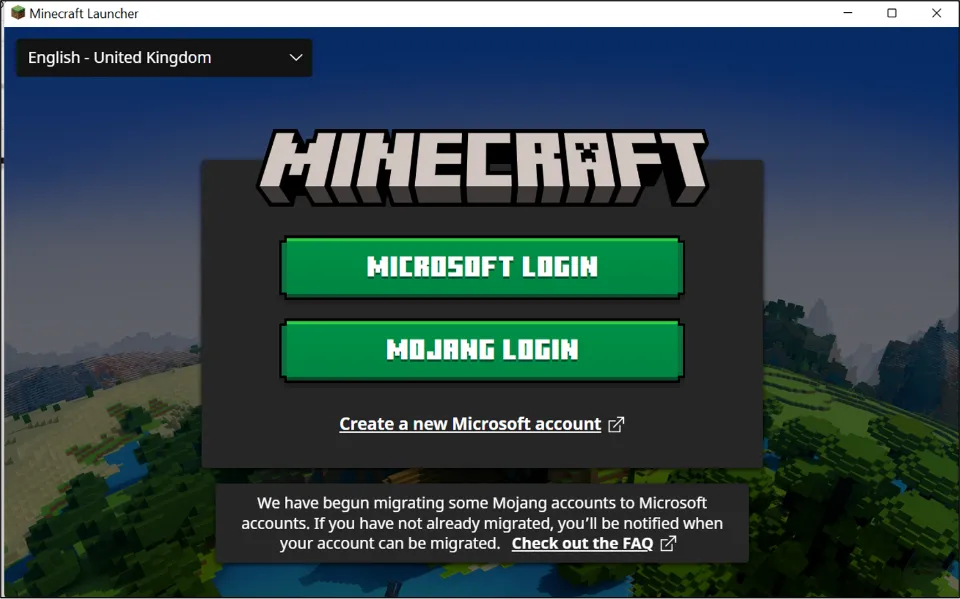
11. Log in to your Minecraft account with the same profile you used, to purchase it.
12. The game’s license will be activated immediately.
How to Update Minecraft Java Edition on Windows 11
There’s a chance you might be playing a Java download version of Minecraft on your Windows 11 computer. If that’s the case, you’ll need to get your update by opening the Minecraft launcher.
Method 1: Updating Minecraft Java edition from the Launcher.
Since this classic version of the game was released when Windows 7 was in use, it can also be updated without the Microsoft Store app.
1. Open the Minecraft Launcher
2. Press the Play (or Play Demo if your have the trial version) button, placed next to the latest version. This will automatically install and run the updated version of the game.
Method 2: Uninstall the Older Version & Install the Latest Version from the Minecraft Website
For the Java edition, one will notice, in Settings, under the App and features window only the Minecraft launcher will be listed and not the entire game program. So, uninstalling the launcher will not uninstall the game itself. To completely remove all the files of the game, the steps given below can be observed:
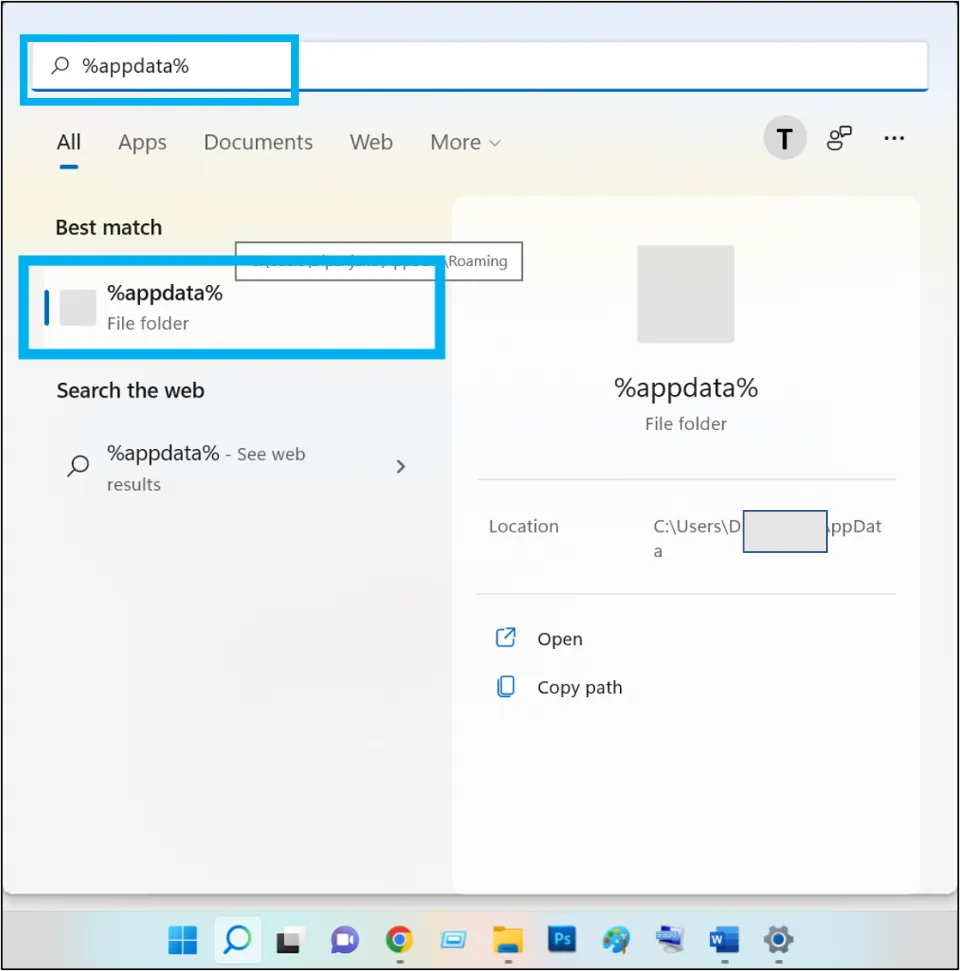
1. In the search bar, type %appdata% and hit enter.
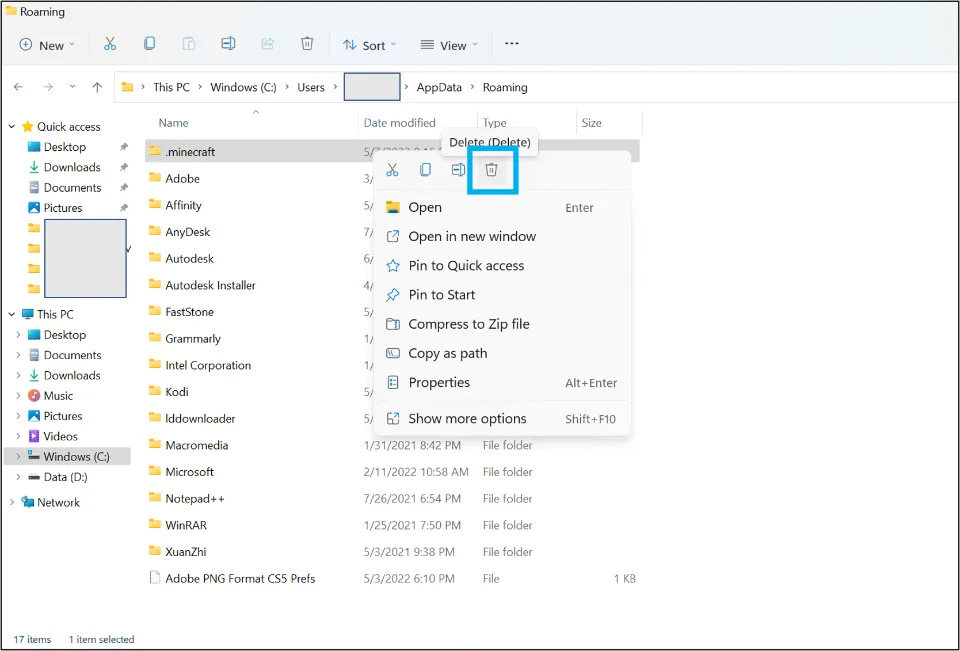
2. Look for a folder named .minecraft
Right-click on the folder & choose the Delete.
Alternately, press the shift and delete keys together to permanently delete the folder and files in it. This will help remove program files completely.
3. Restart your PC
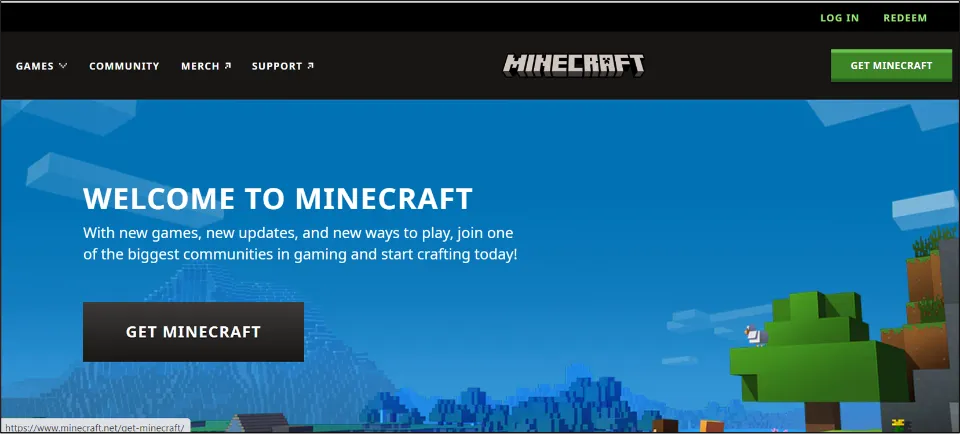
4. Go to Minecraft’s official website and if already purchased, there is an option to download it again for Windows 11.
How to Troubleshoot Minecraft Not Updating Issue
In case of an error showing as try that again, something went wrong (error code: 0x80070490), Windows need to be updated before the game. Here are the steps:
1. Go to Settings
2. Select Windows Update on the left panel. Choose Check for updates on the right
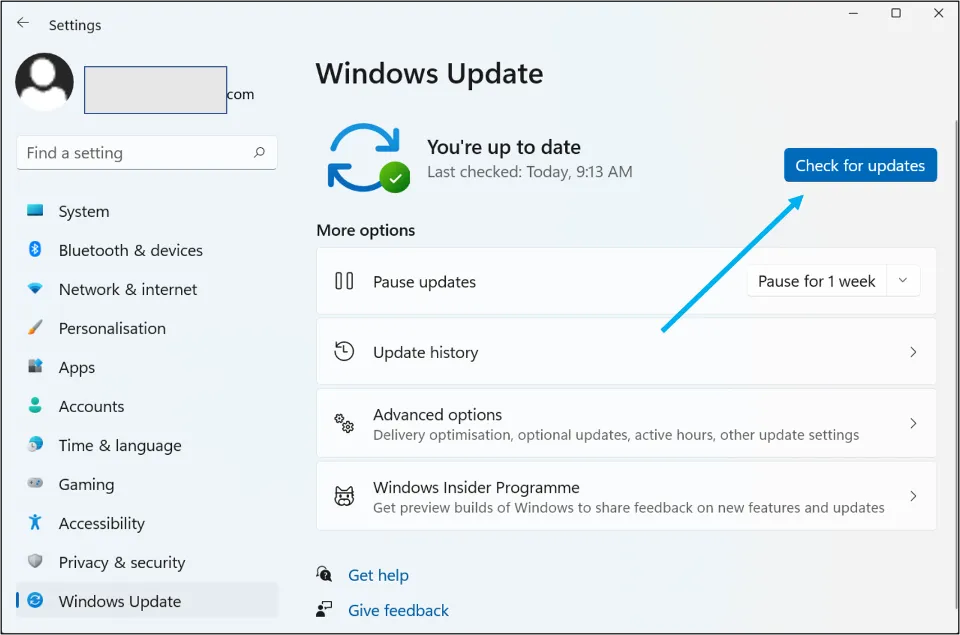
3. Windows will start checking for updates.
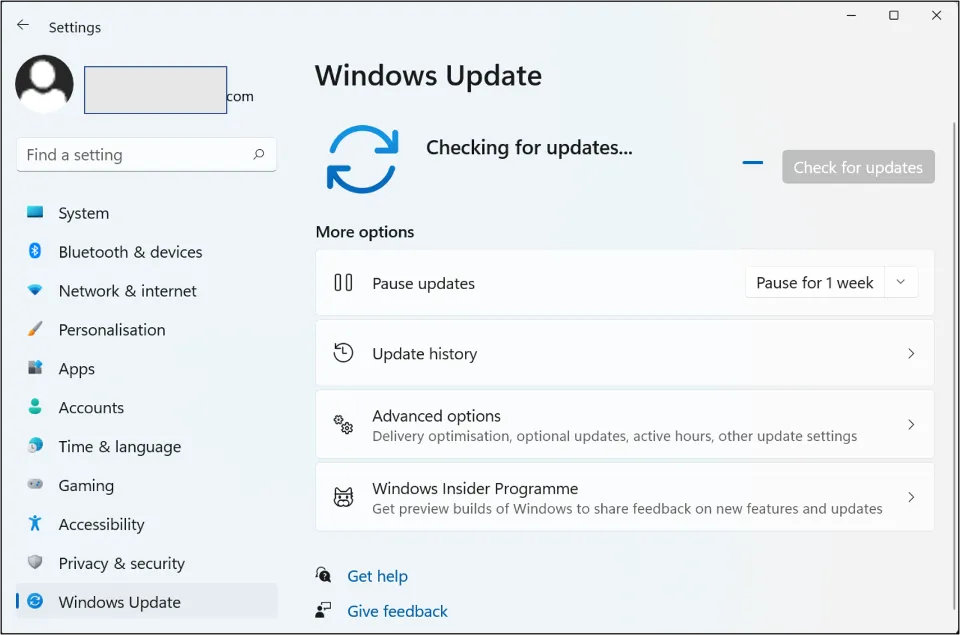
4. If any update is available, click on Download now.
Conclusion
To update Minecraft the correct way, use these above-mentioned methods. It won’t take long to update Minecraft if you have Windows 11.
Remember knowing the version of your game is of utmost priority, to update Minecraft without any glitches. Hope the above-mentioned quick fixes to the updating issue of Minecraft, work for those in need of it.
Frequently Asked Questions
Why is my Windows 11 Minecraft not updating?
The game app may require a repair or reset. Go to Control Panel > Programs & Features > Find the Minecraft app in the right-side panel > Right-click on it > a small window opens; hit the repair option enlisted in it. Advance options > Repair/Reset > Update the game again.
How do you force a Minecraft update?
Open Minecraft launcher > Next to Username is Options, click on it > Hit the Force update button > press on Done > Login using your username and password > Update will start.
What to do if there is an error while trying to update Minecraft?
You need to Update Windows first and then try again.
Is Minecraft Java on Windows 11?
Yes, both java and bedrock editions are available for Windows 11.